Set up tables & areas
Areas and tables power dine-in ordering. Create an area, add tables to it, place each table on the area's floor plan, then print a QR code for every table so customers can scan and order from their seat. Watch the video, then follow along below.
Step 1 — Add an area
Open Tables & Areas from the sidebar and go to the Areas tab. Click Add.
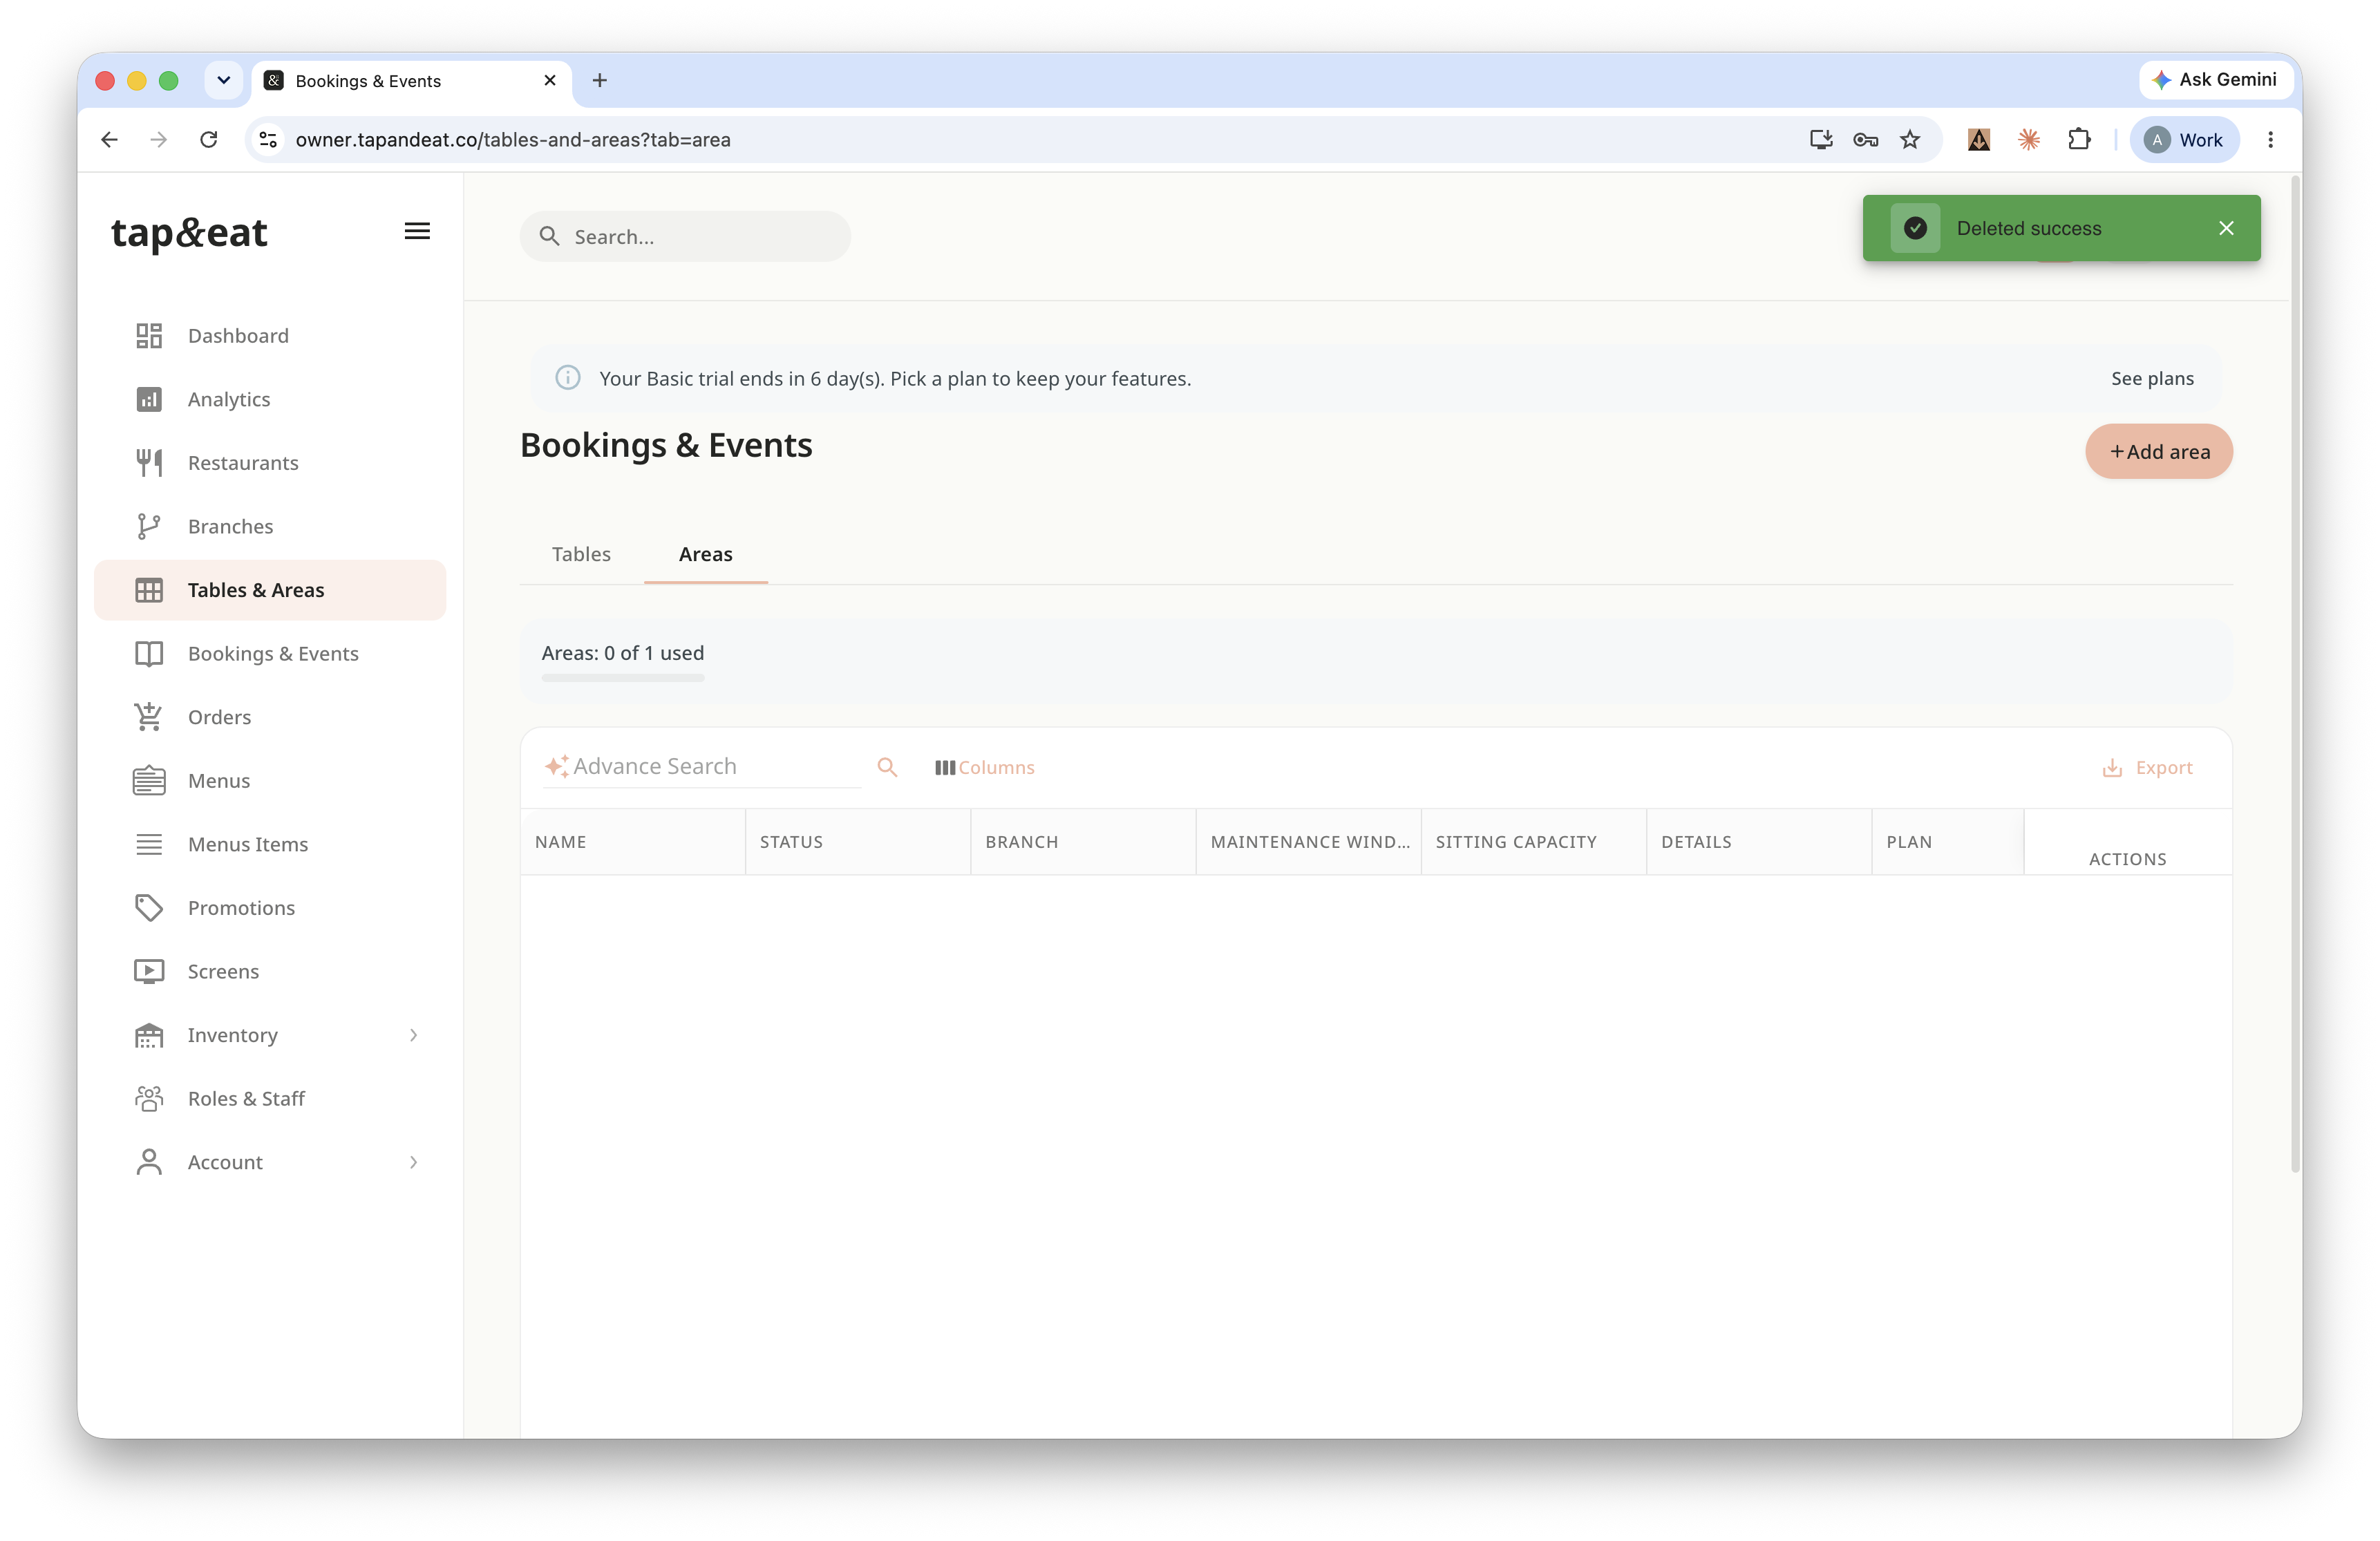
Step 2 — Area details
Enter the area name (for example, "Main Hall"), set its sitting capacity, choose the branch, and turn Status on. Click Create.
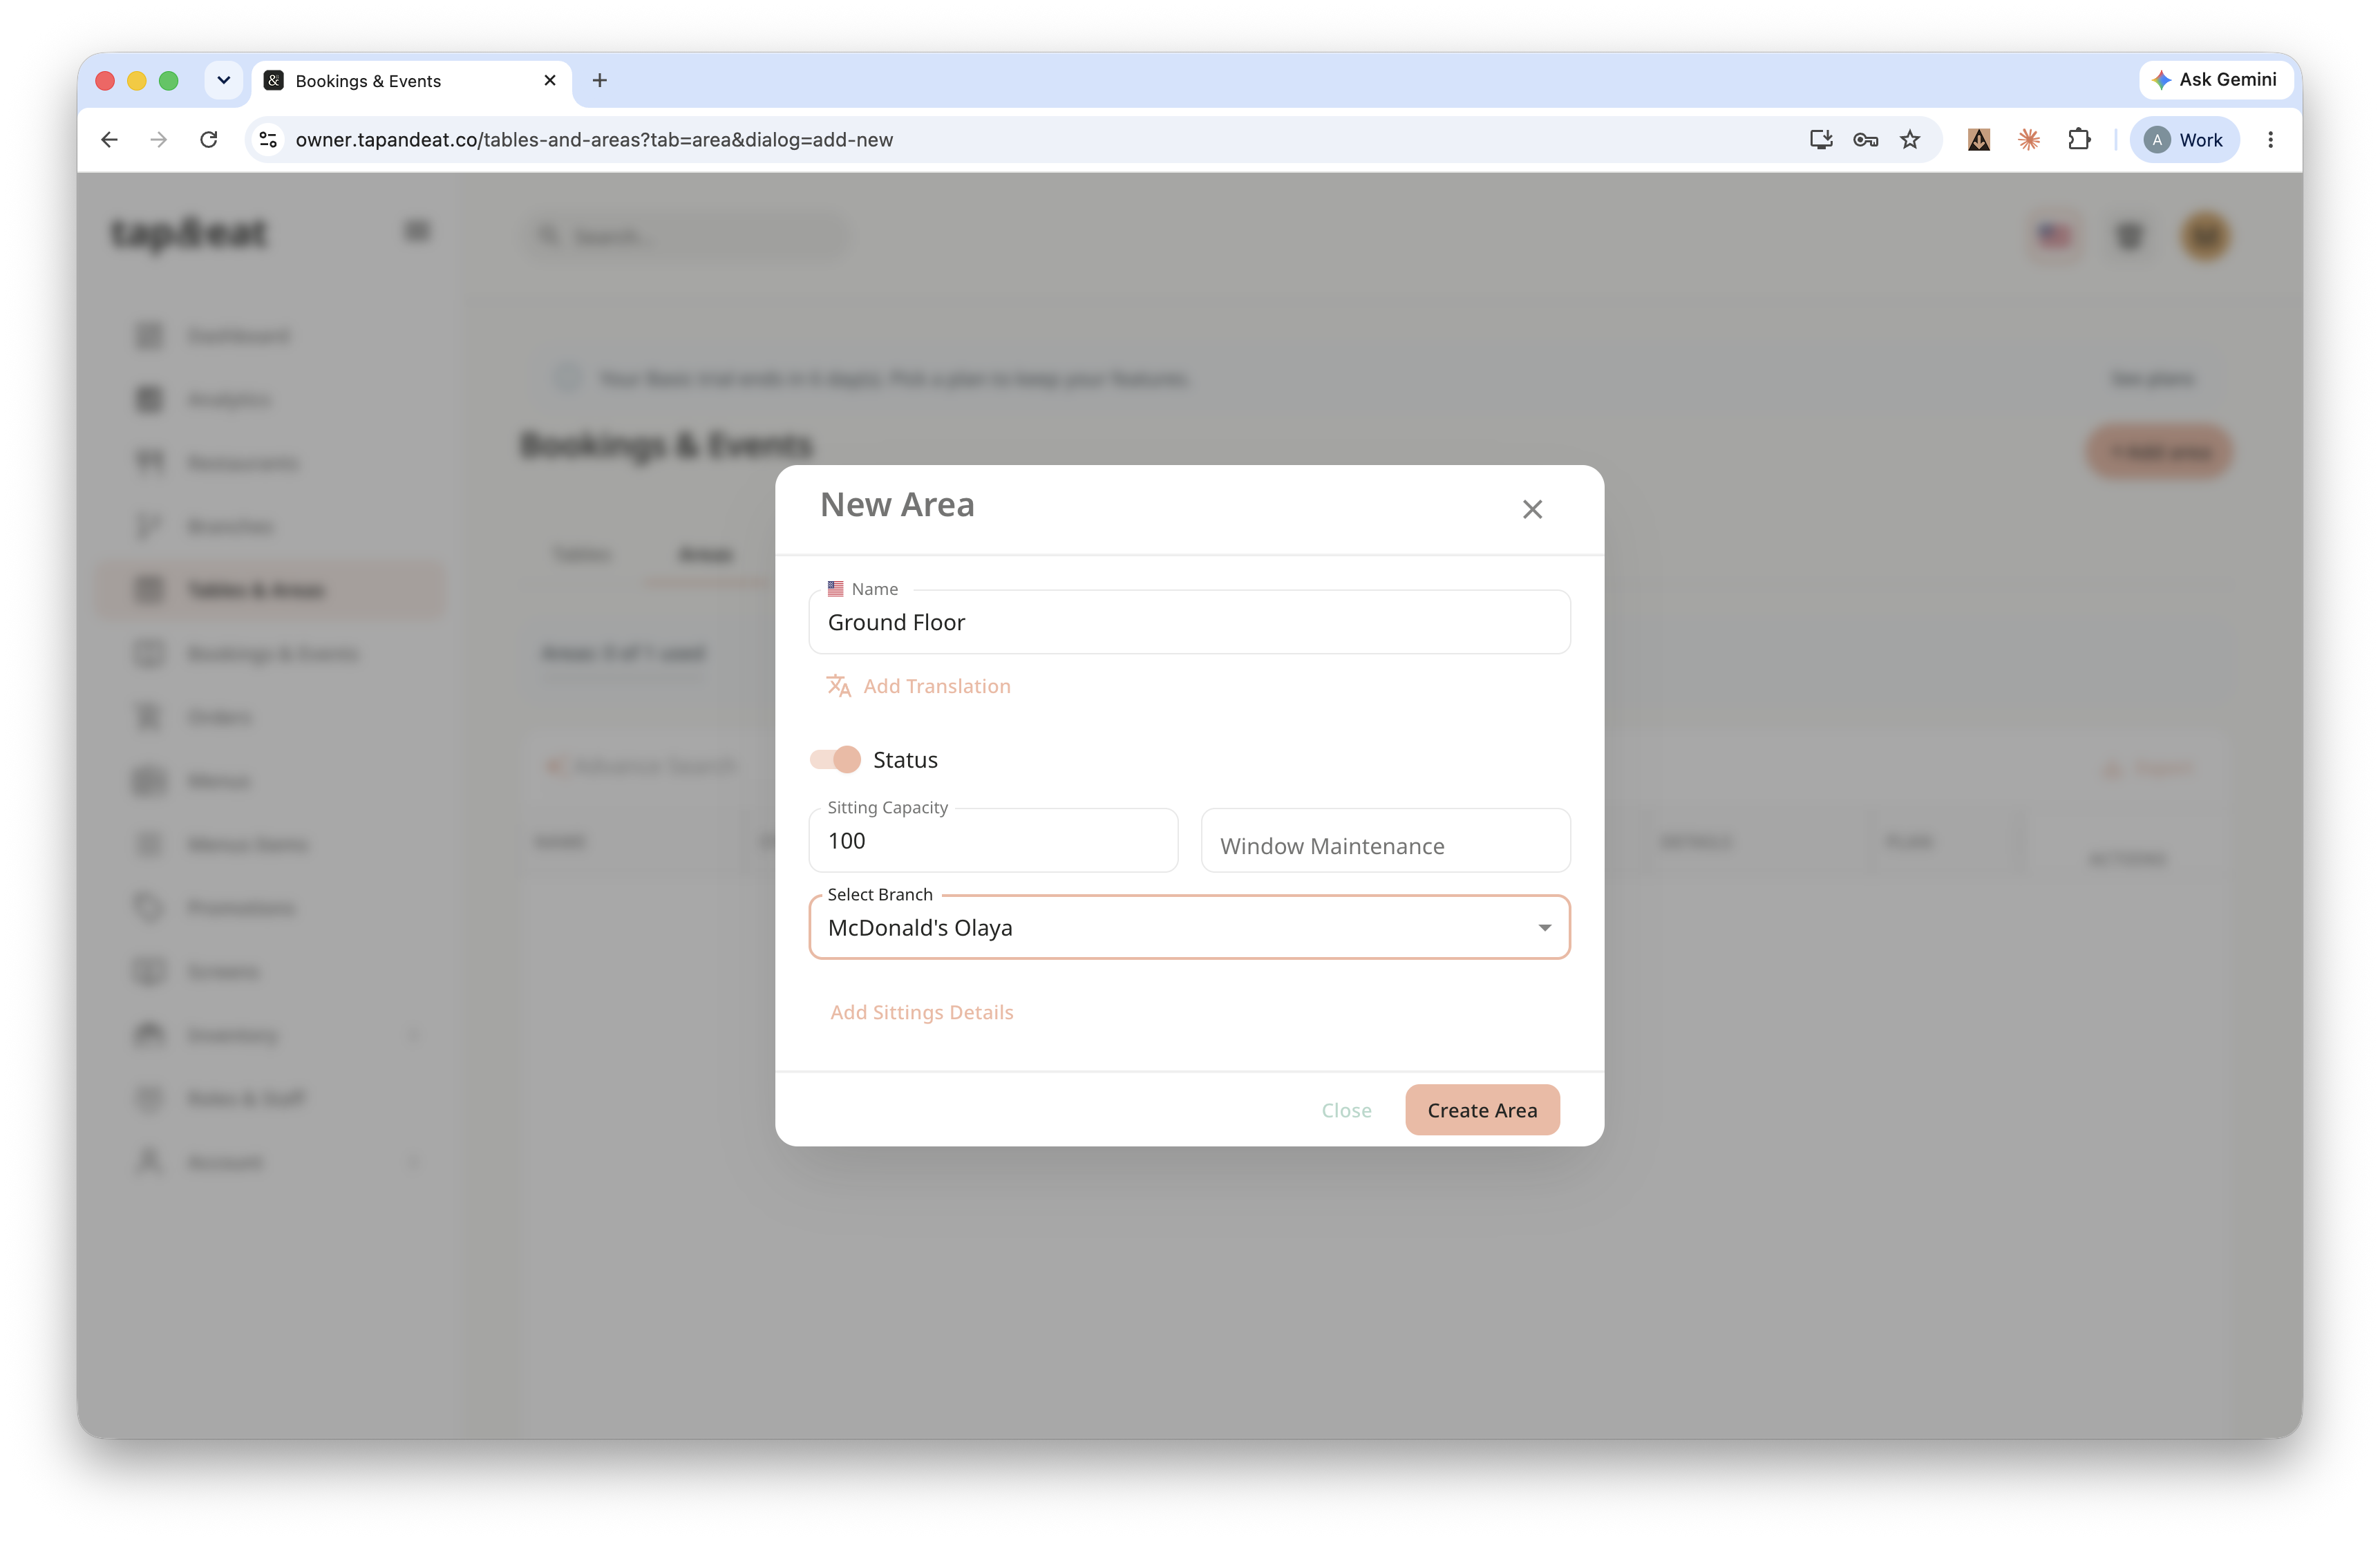
Step 3 — Add a table
Switch to the Tables tab and click Add. Enter the table number, its number of seats, and choose which area it belongs to. Click Create.
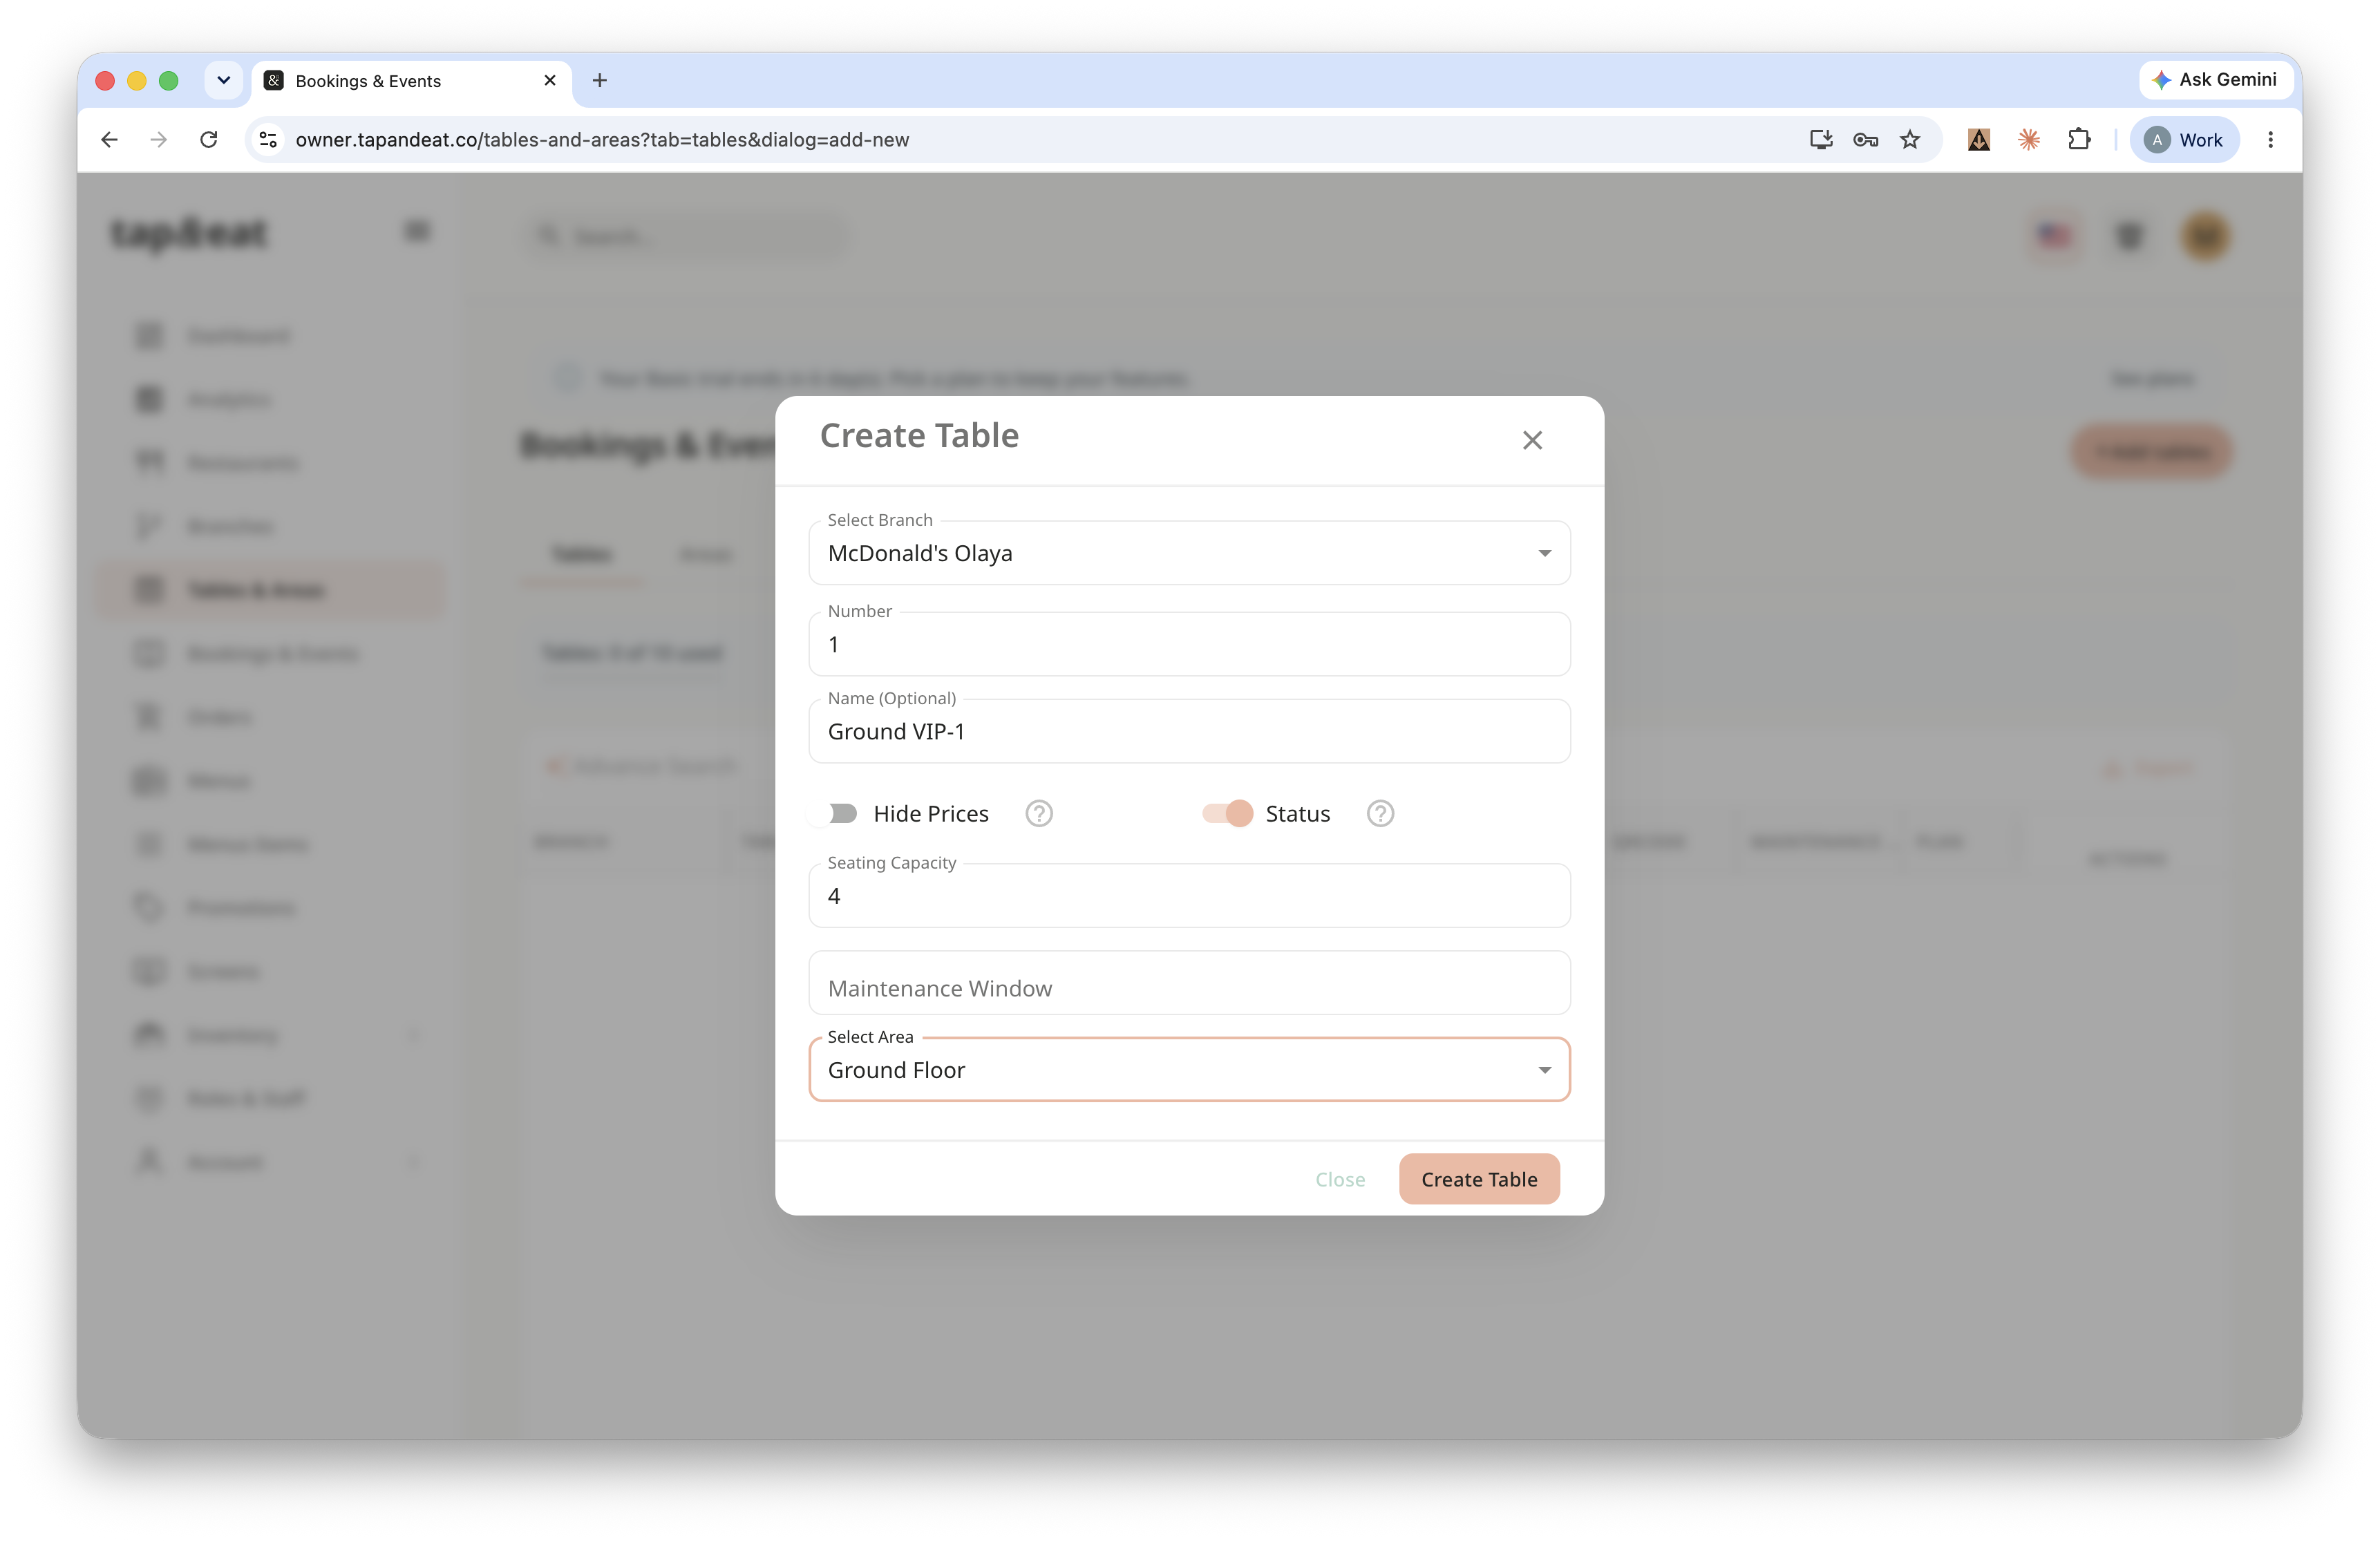
Step 4 — Open the area layout
Go back to the Areas tab and click Details on your area. This opens the floor plan for that area.
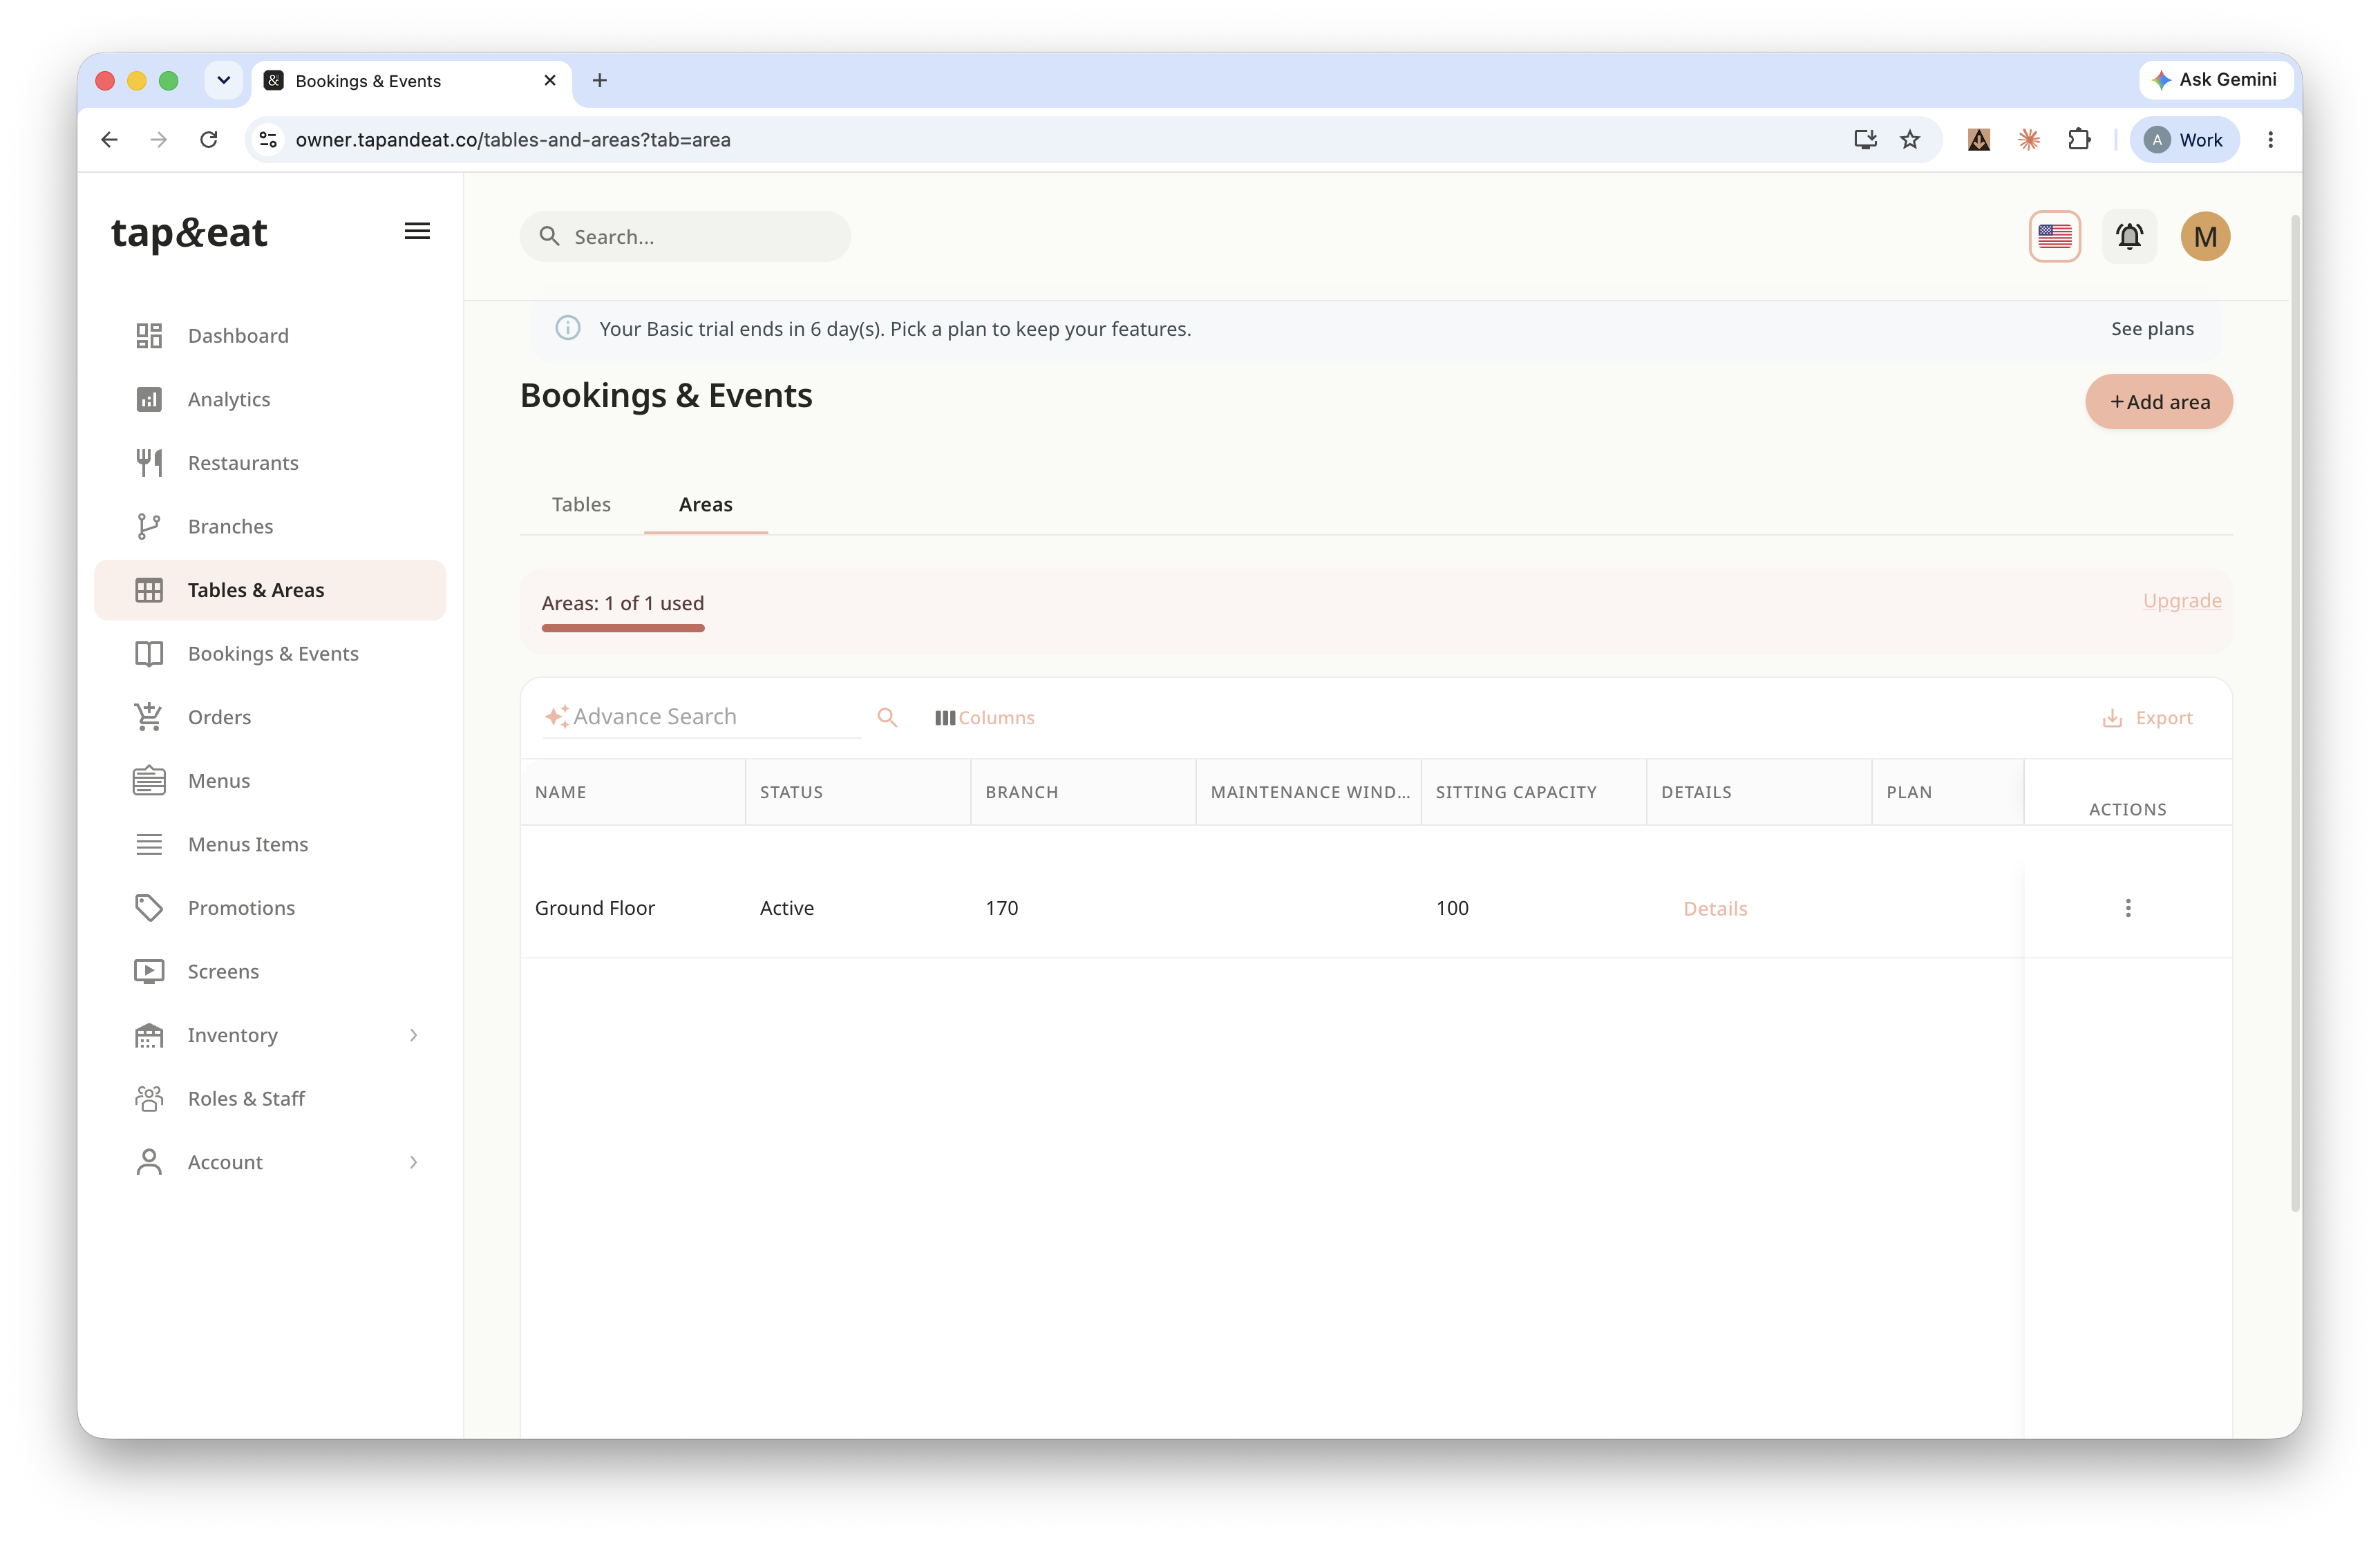
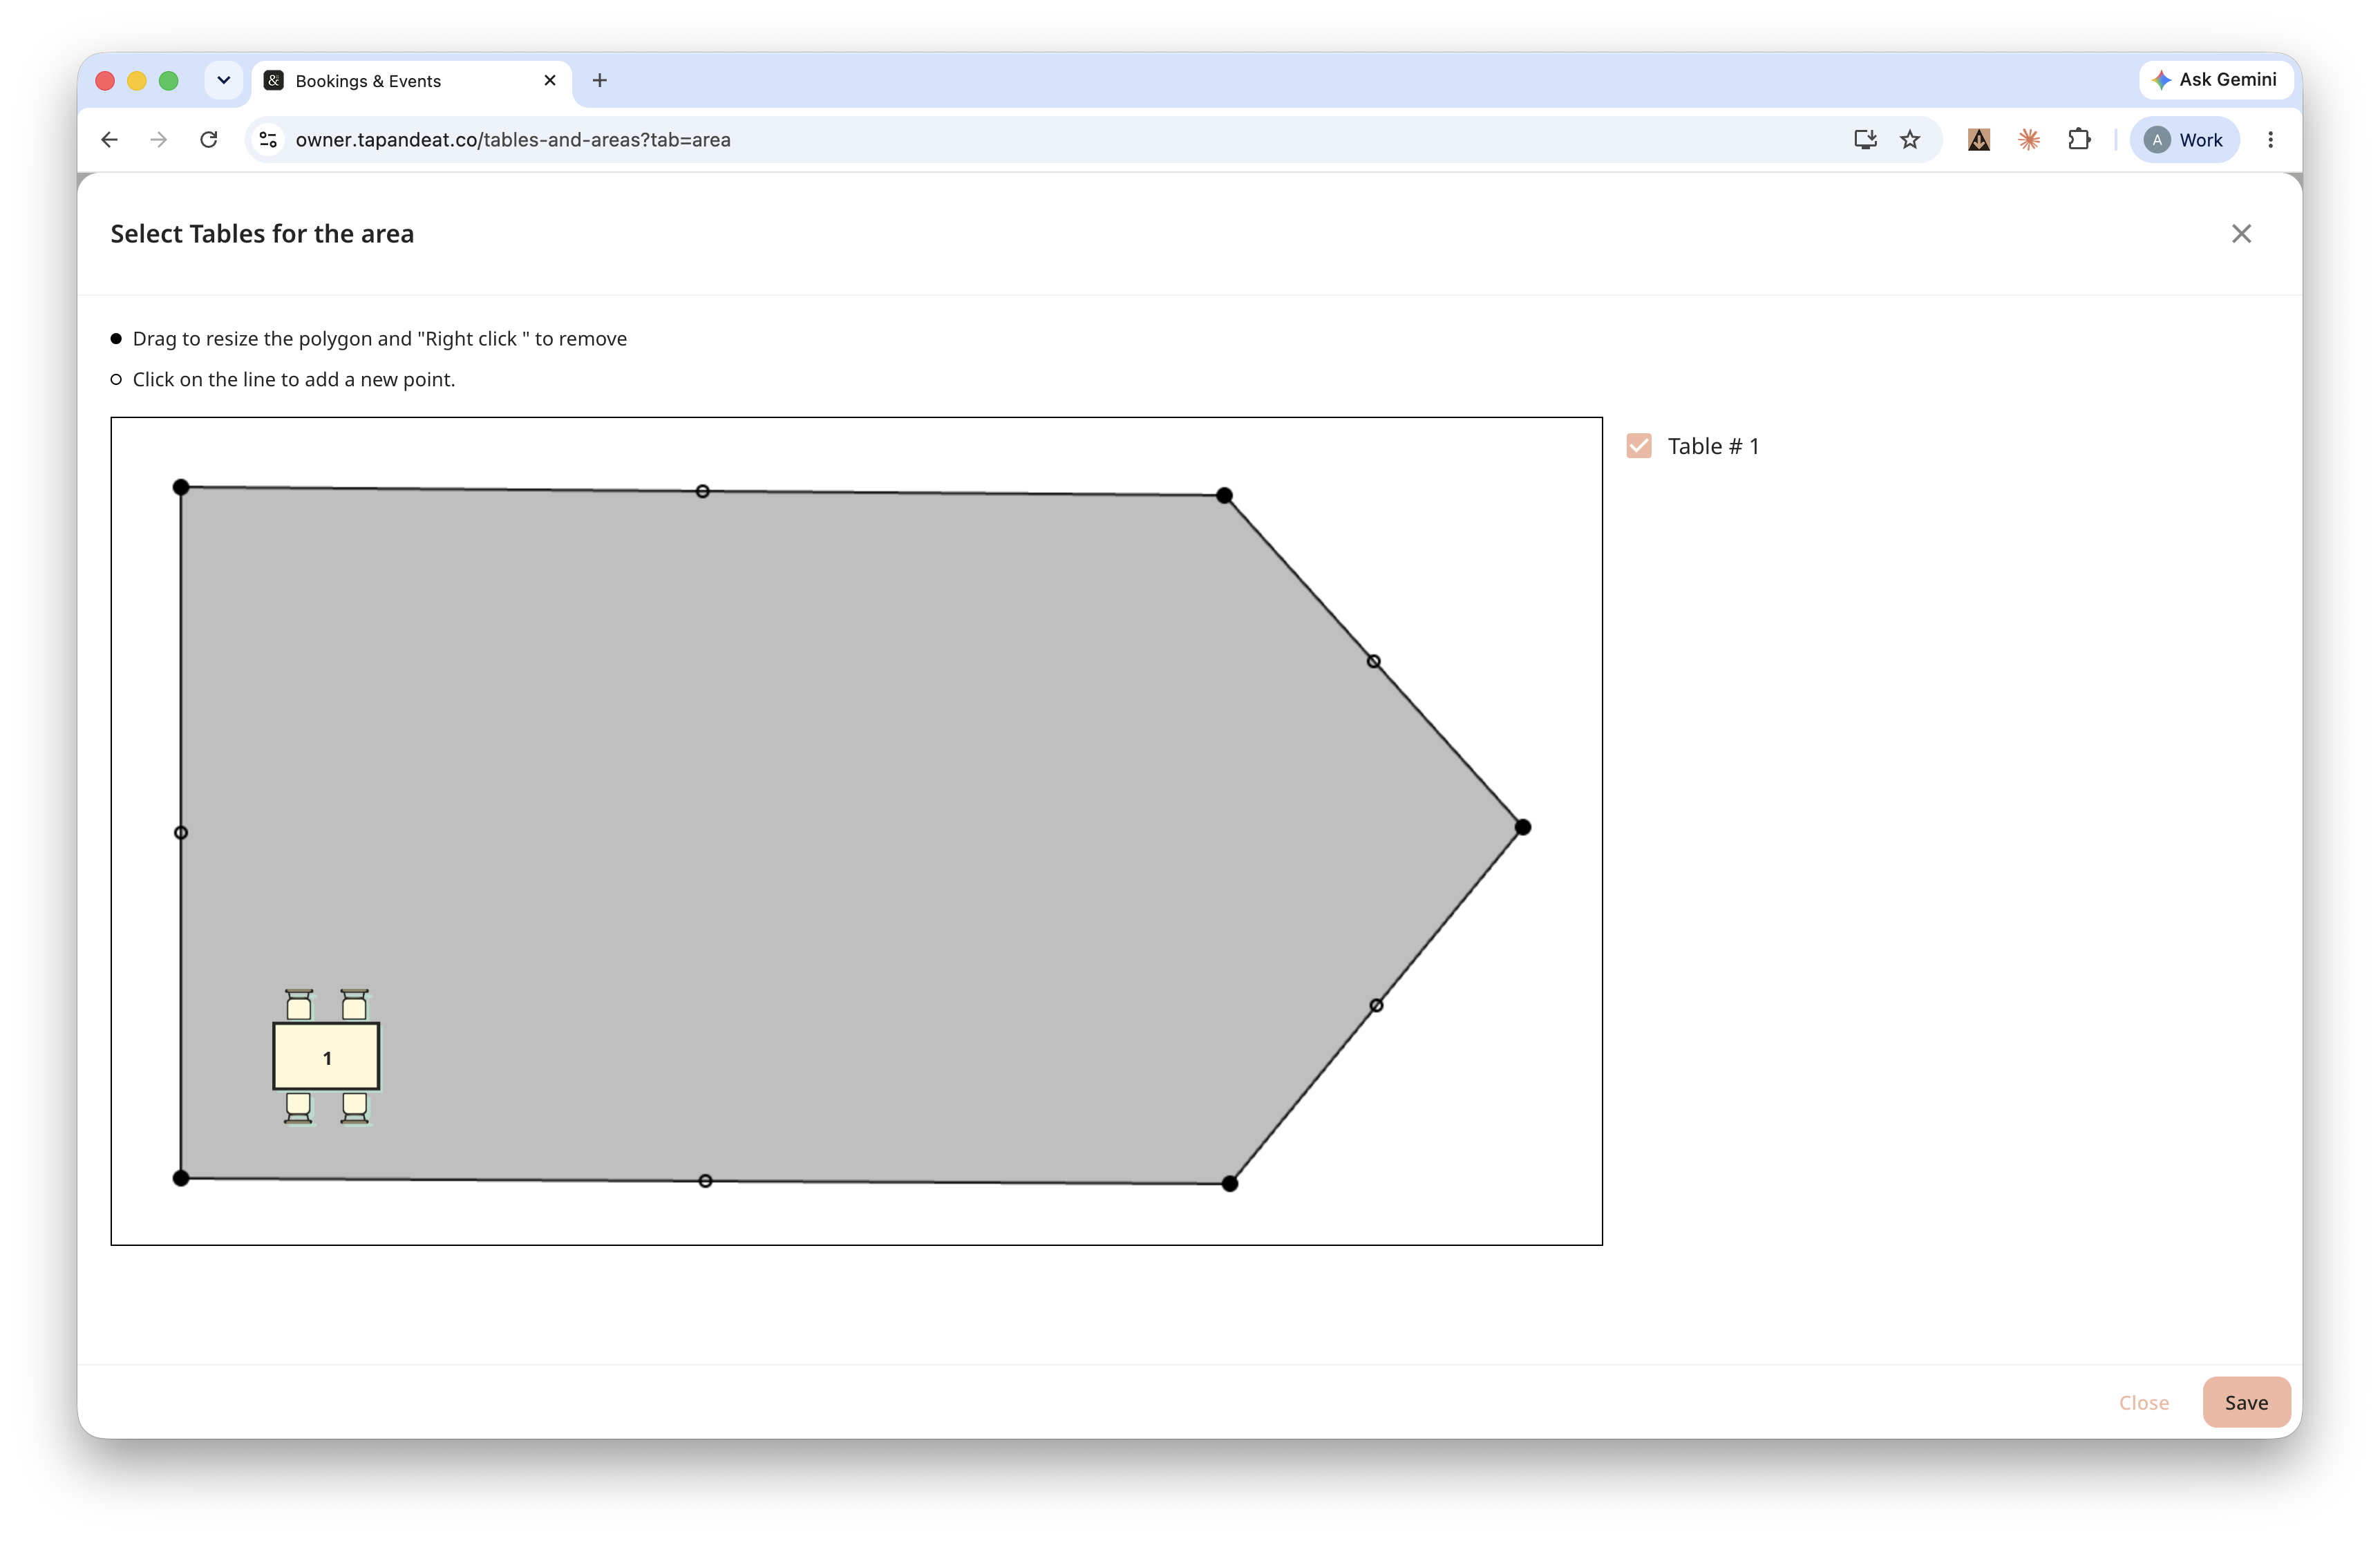
Step 5 — Place the table
Select your table to add it to the layout, then drag it to where it actually sits in the area. You can also reshape the area outline by dragging its corners. Click Save.
Step 6 — Print QR codes
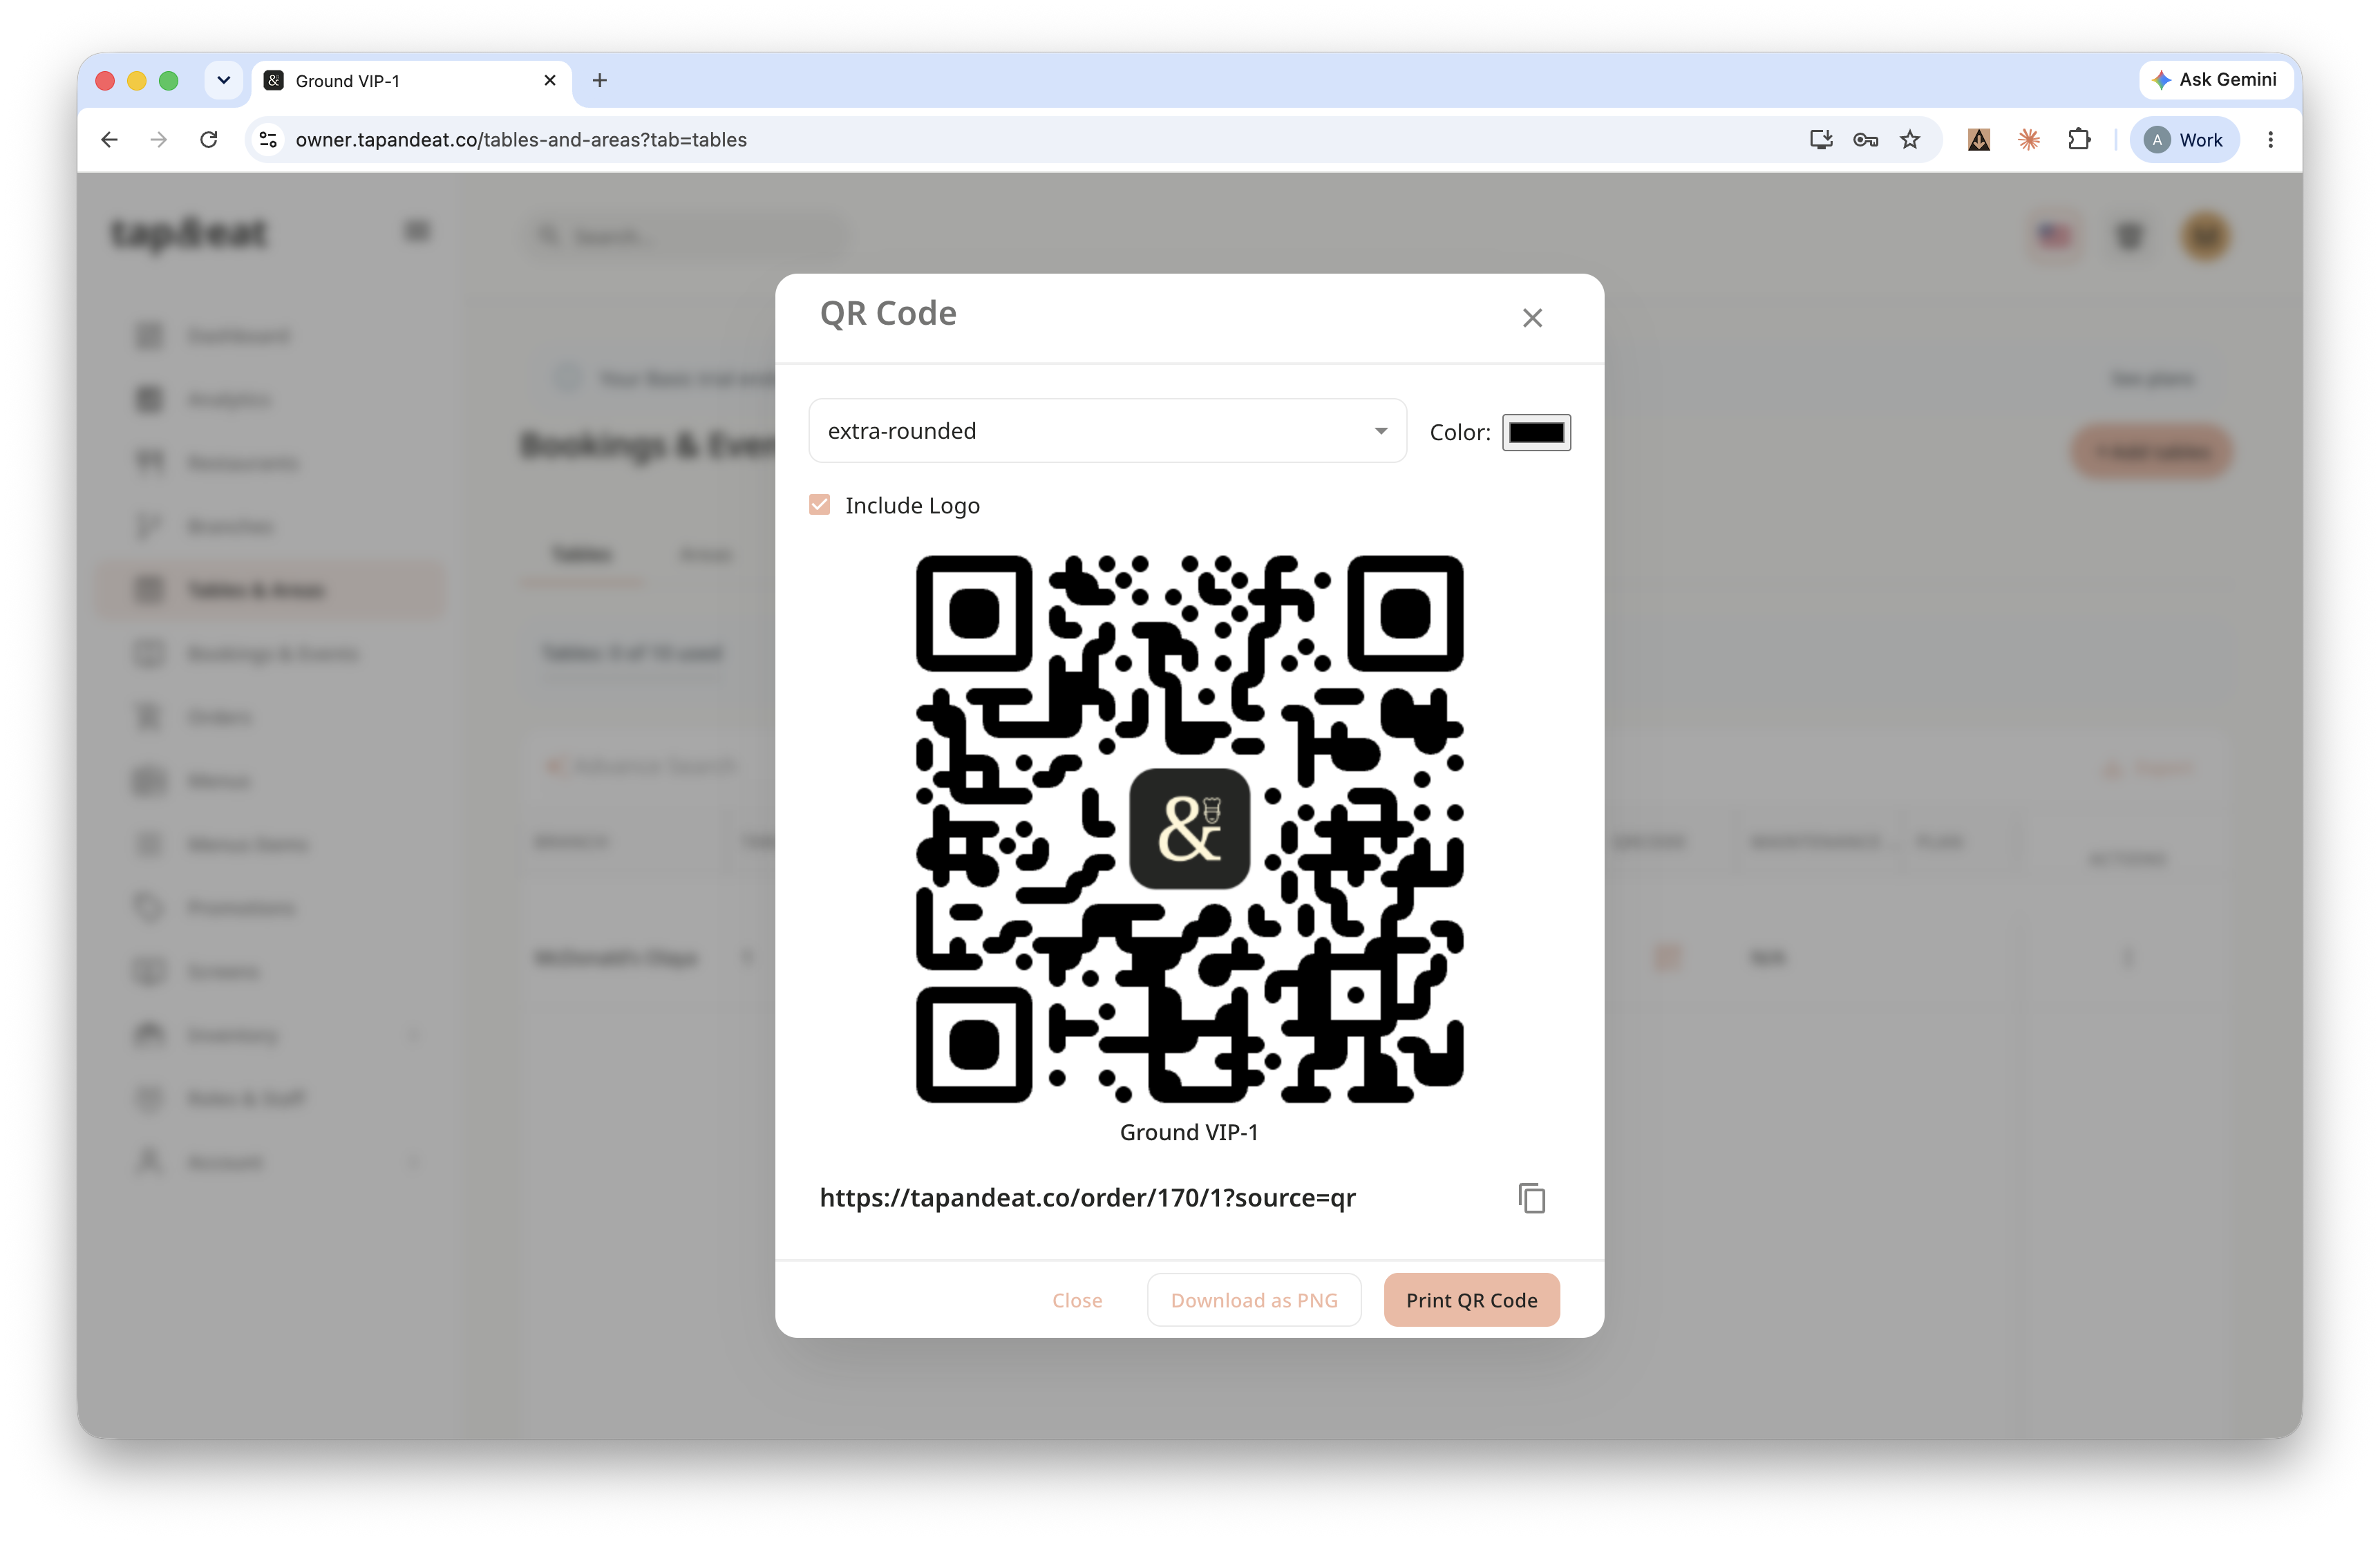
Click Print QR Codes to generate a QR code for each table. Place them on the tables — customers scan to open the menu and order from their seat.
Your dine-in setup is ready.