Add a branch
Adding a branch lets your restaurant serve customers from a new location. It takes four quick steps. Watch the video, then follow along below.
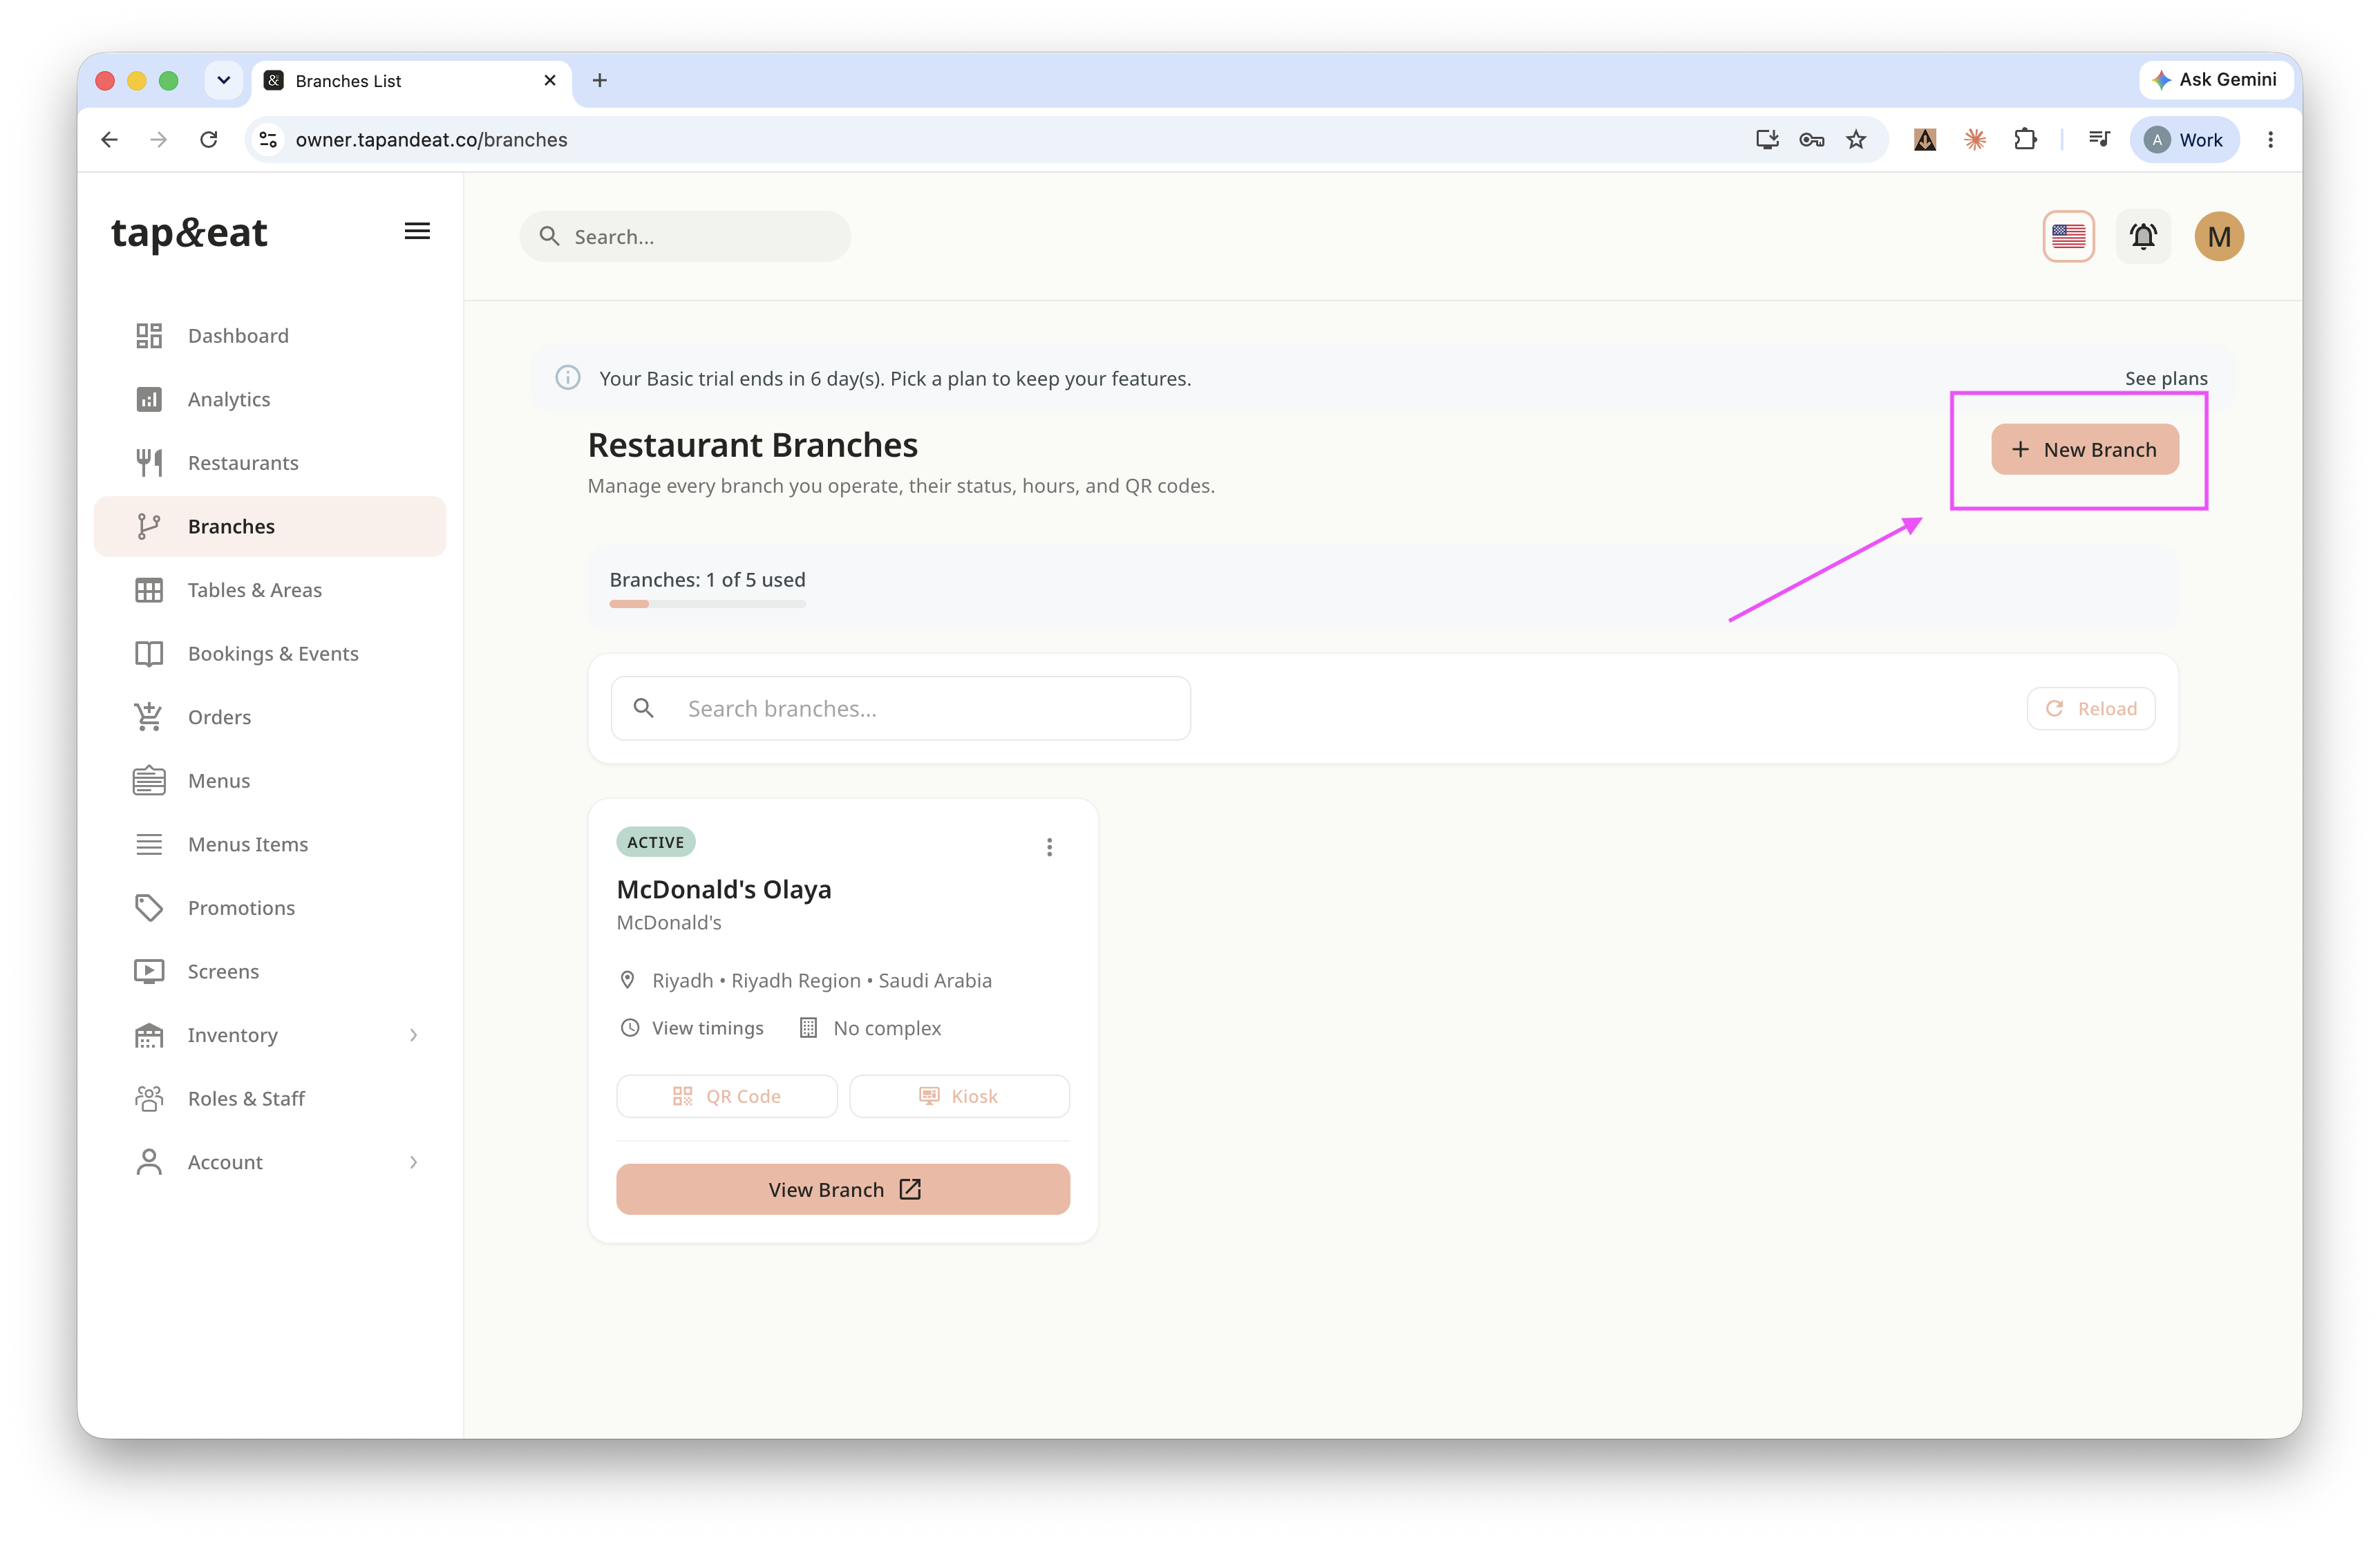
Step 1 — Open Branches
Open Branches from the sidebar and click New Branch.
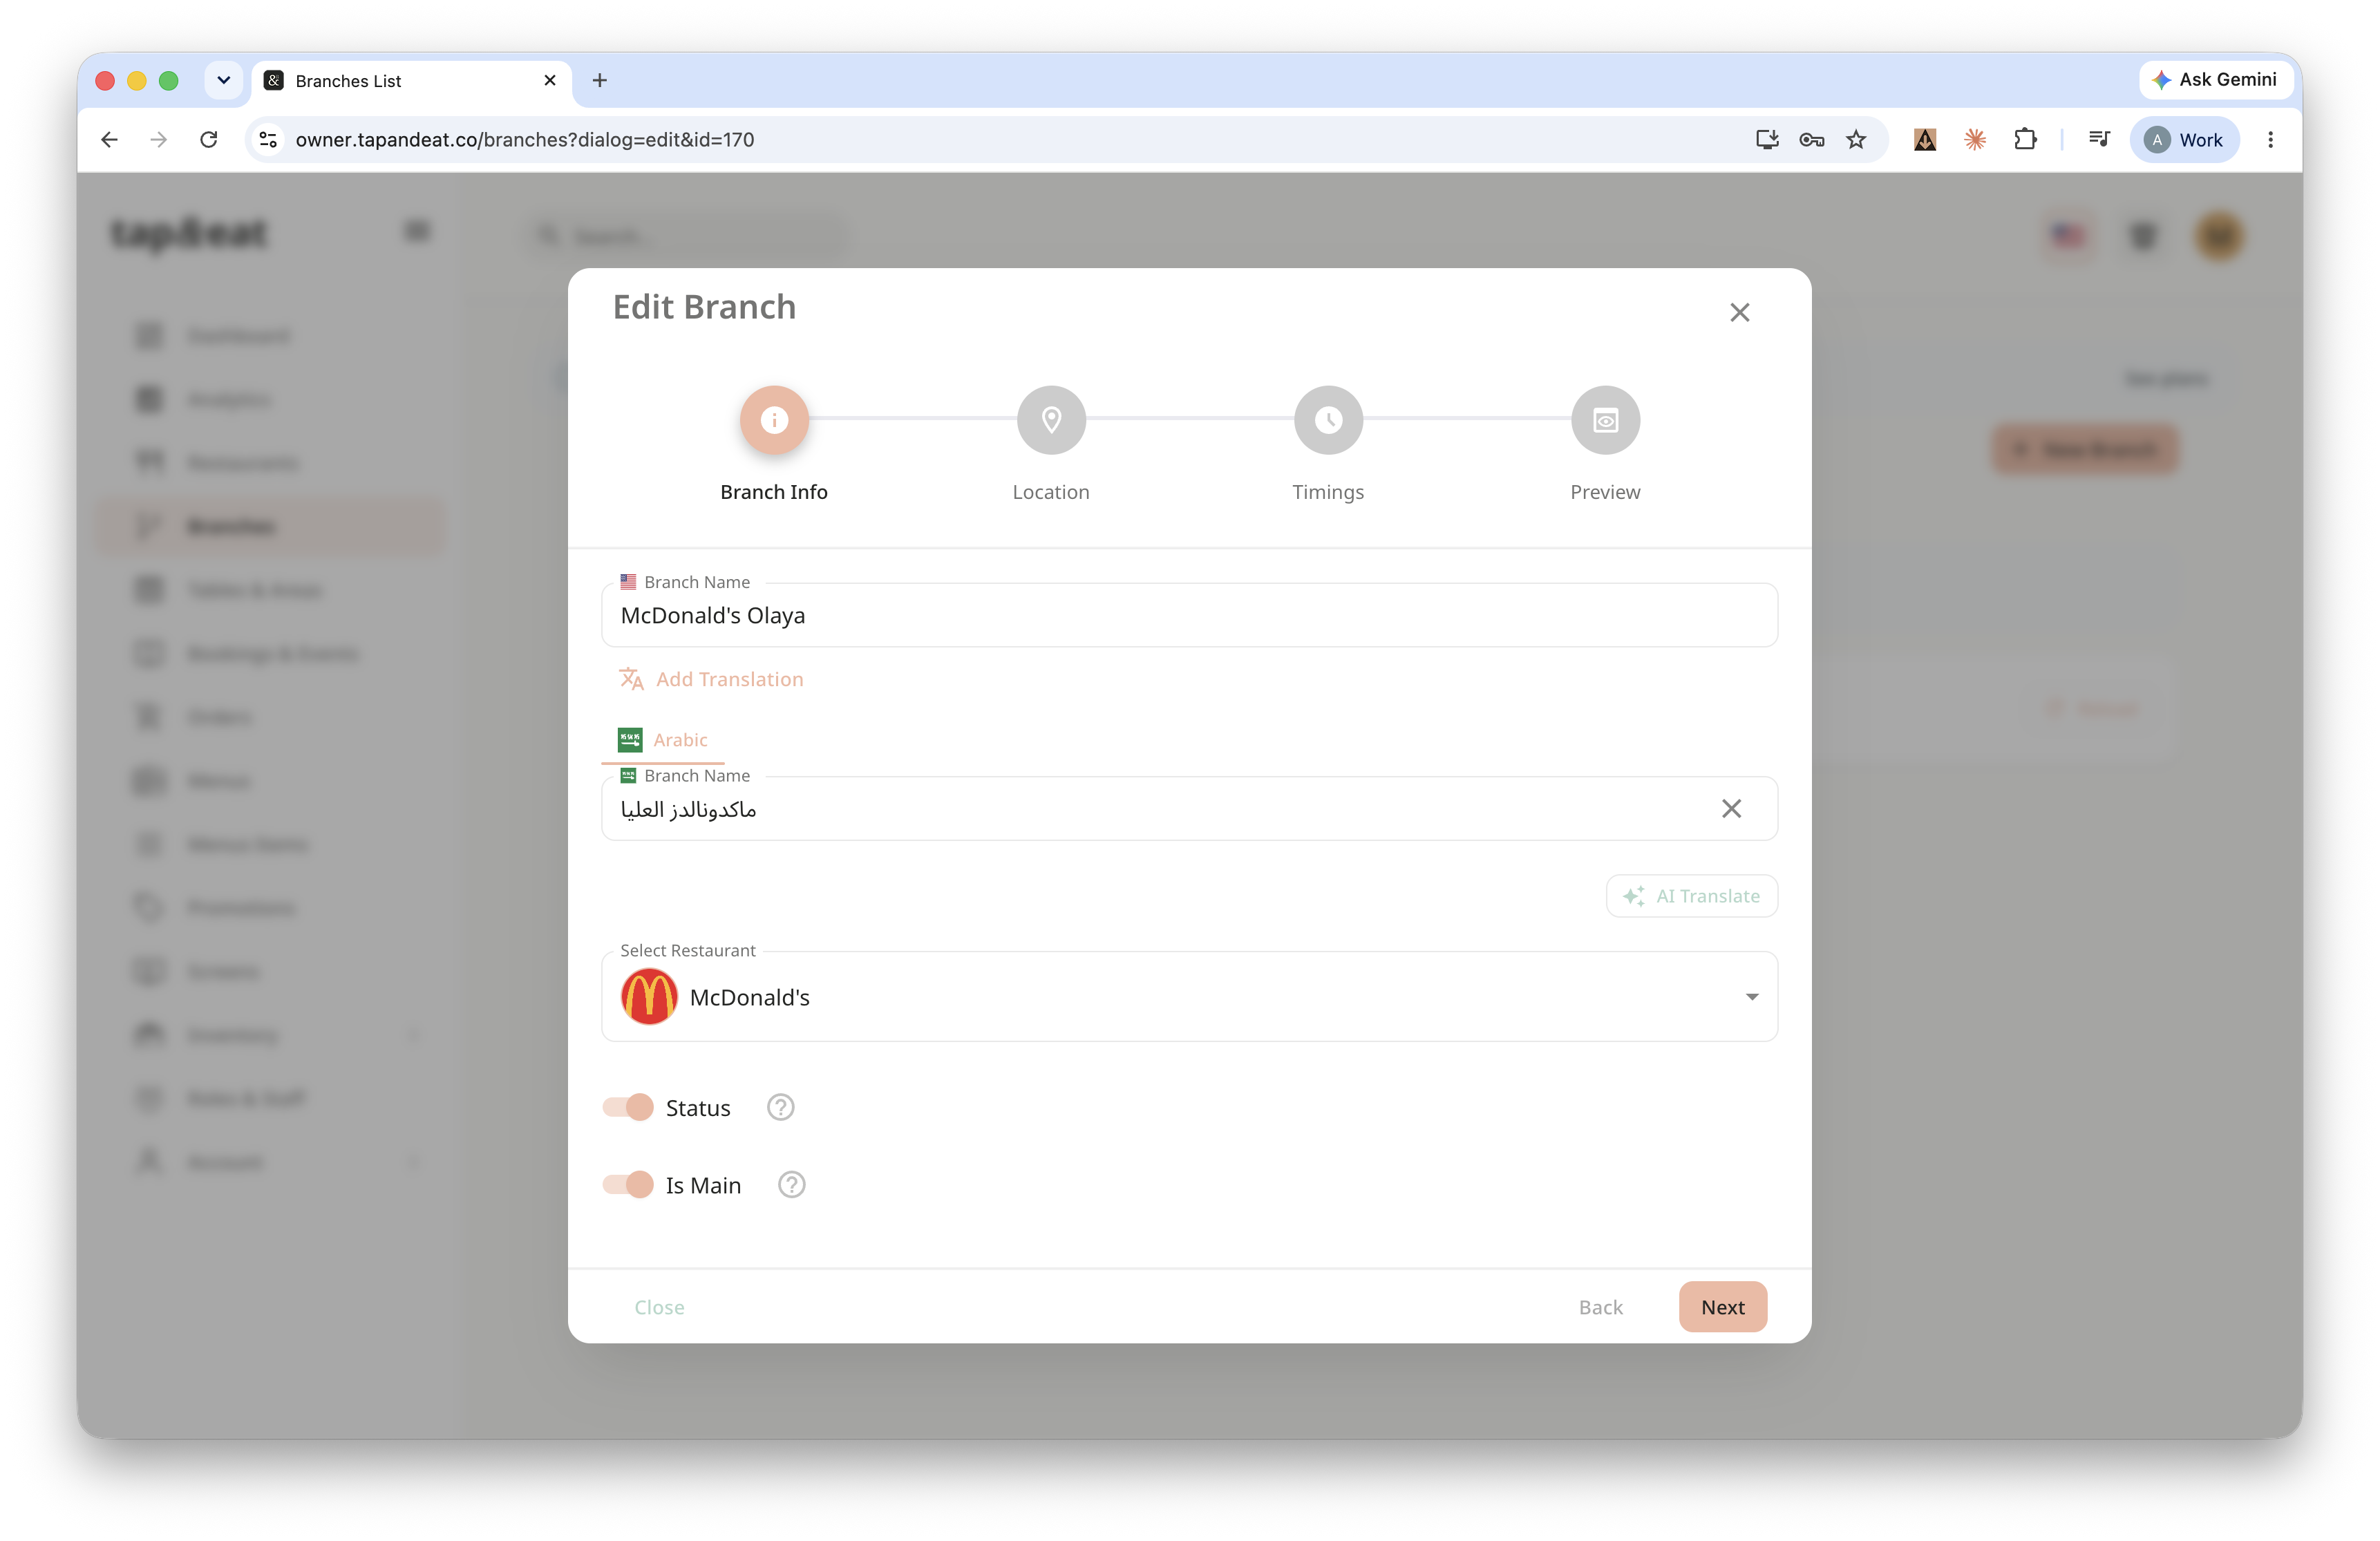
Step 2 — Branch Info
Enter the branch name, choose the restaurant it belongs to, turn Status on so customers can see it, and upload a photo. If this is your main branch, turn on Is Main. Click Next.
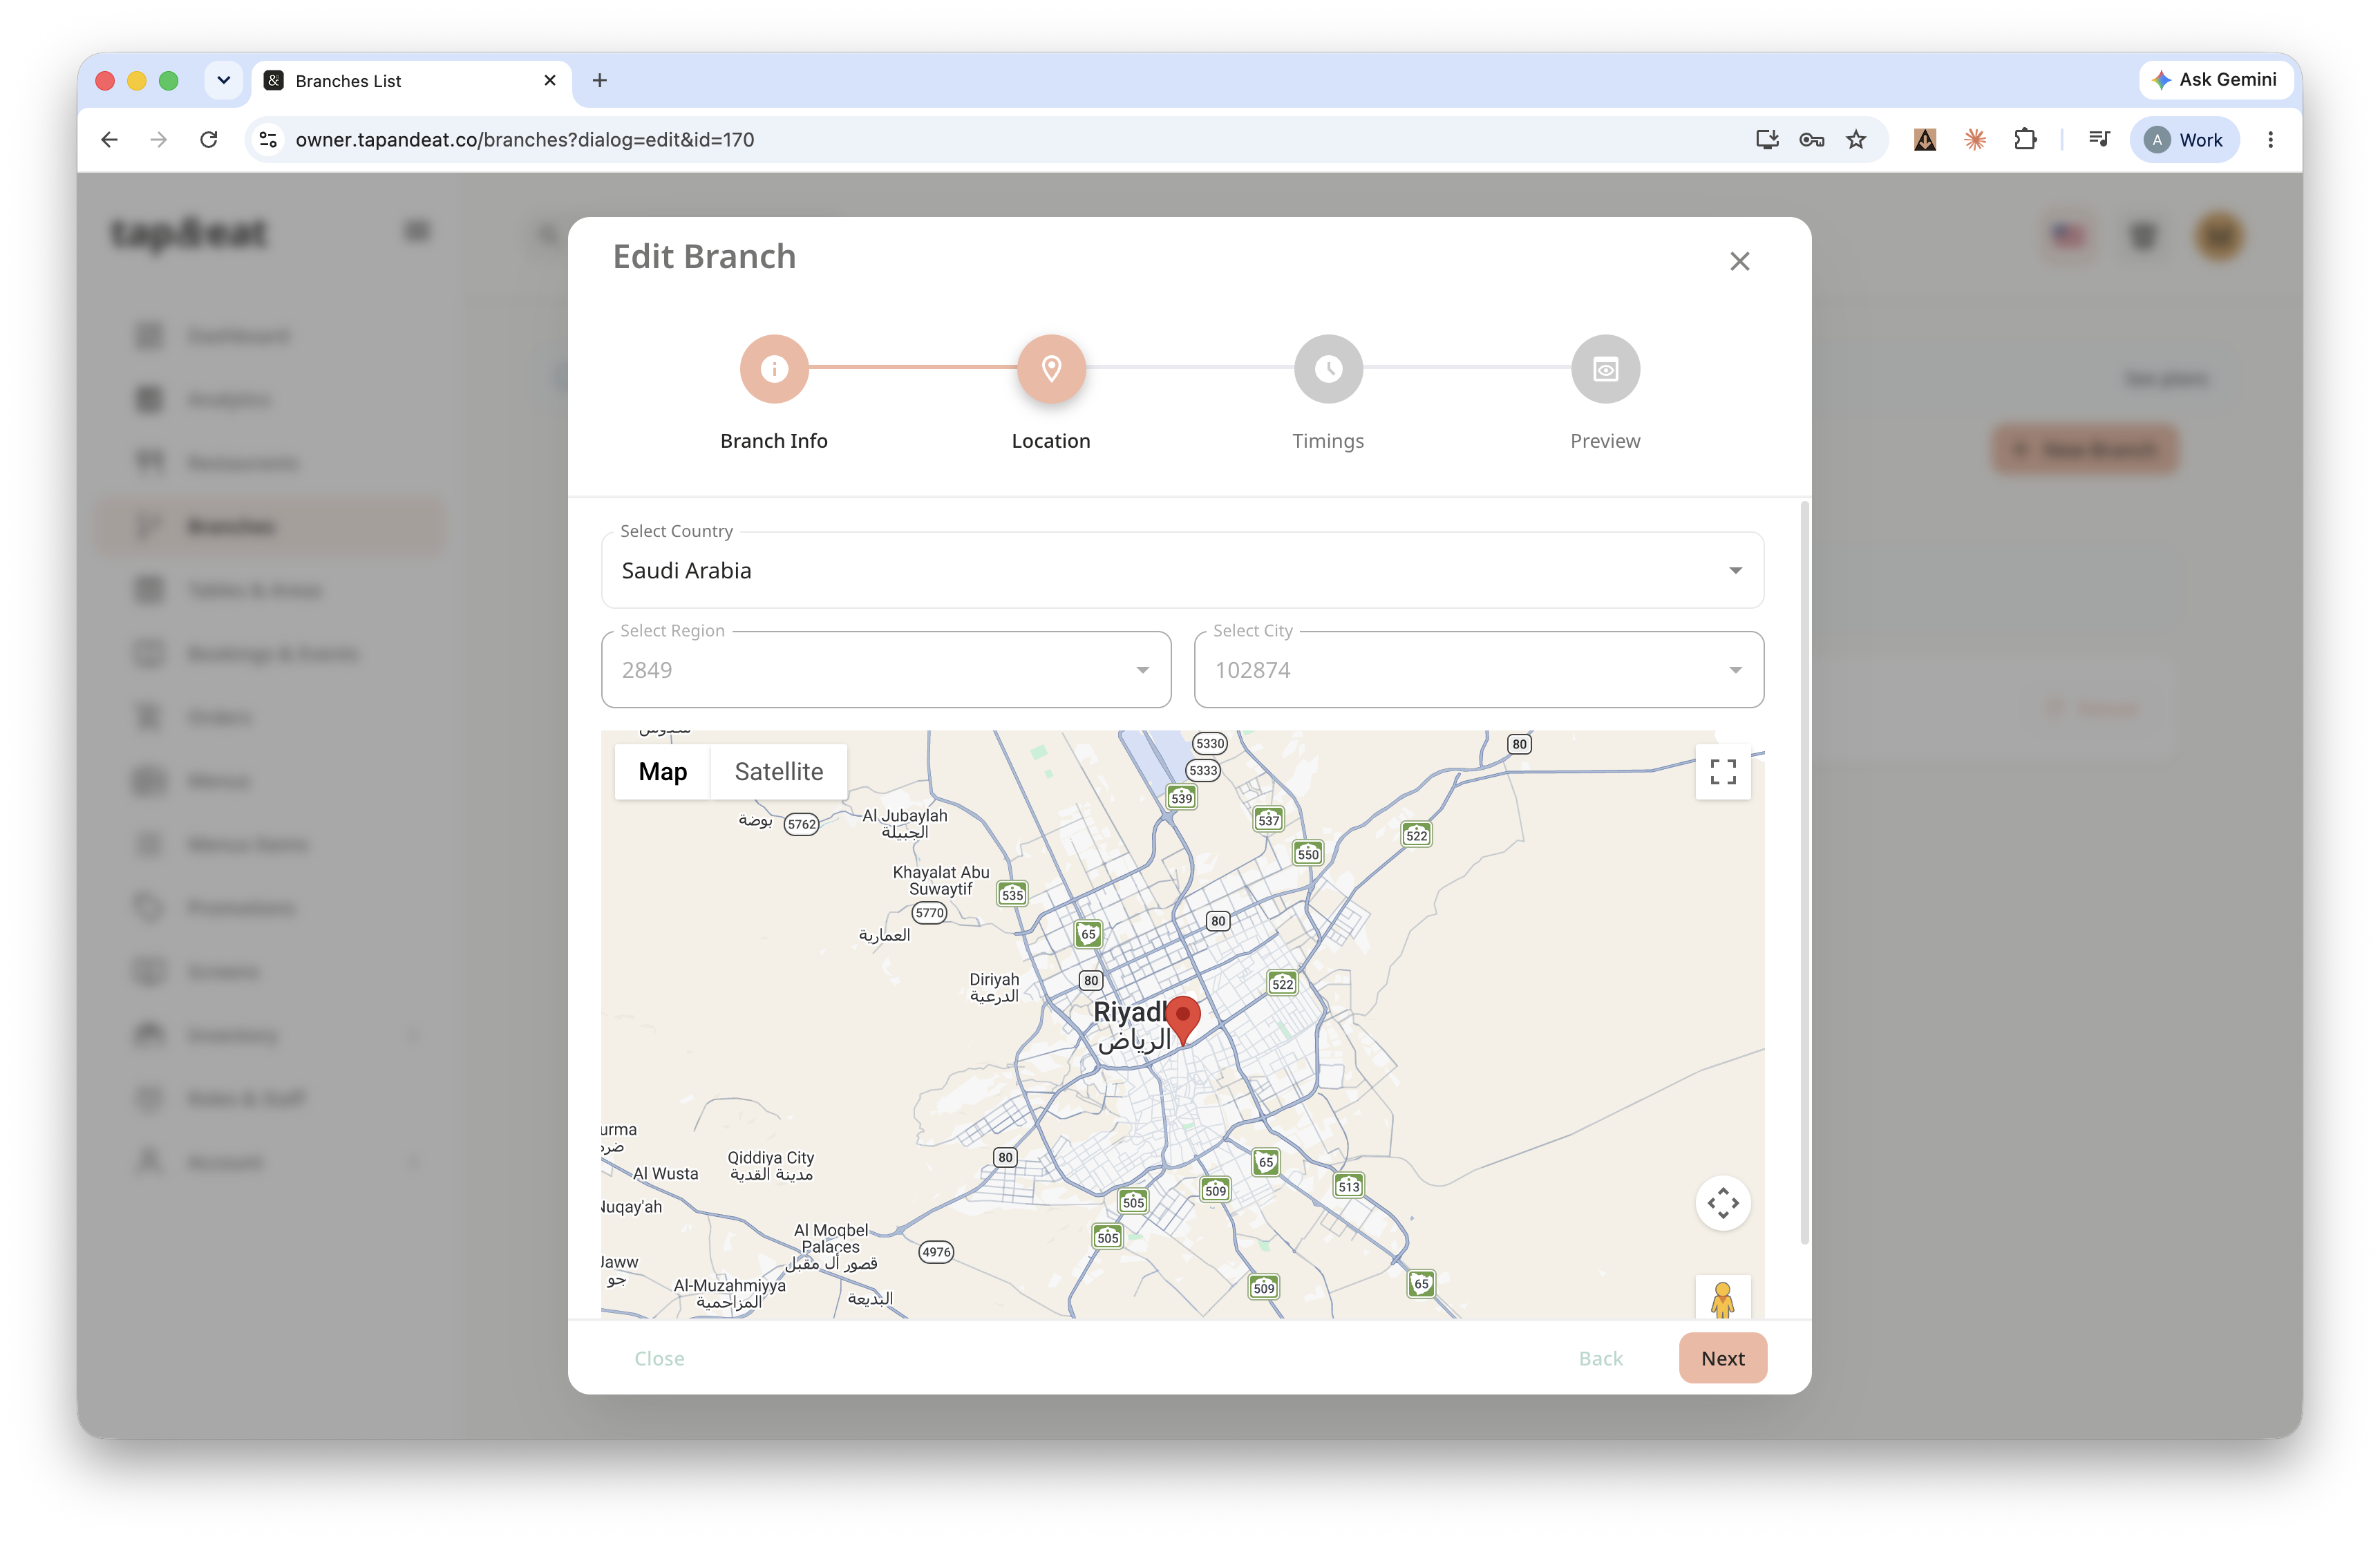
Step 3 — Location
Choose the Country, Region, and City. The map pin drops automatically — drag it to fine-tune the exact spot. Click Next.
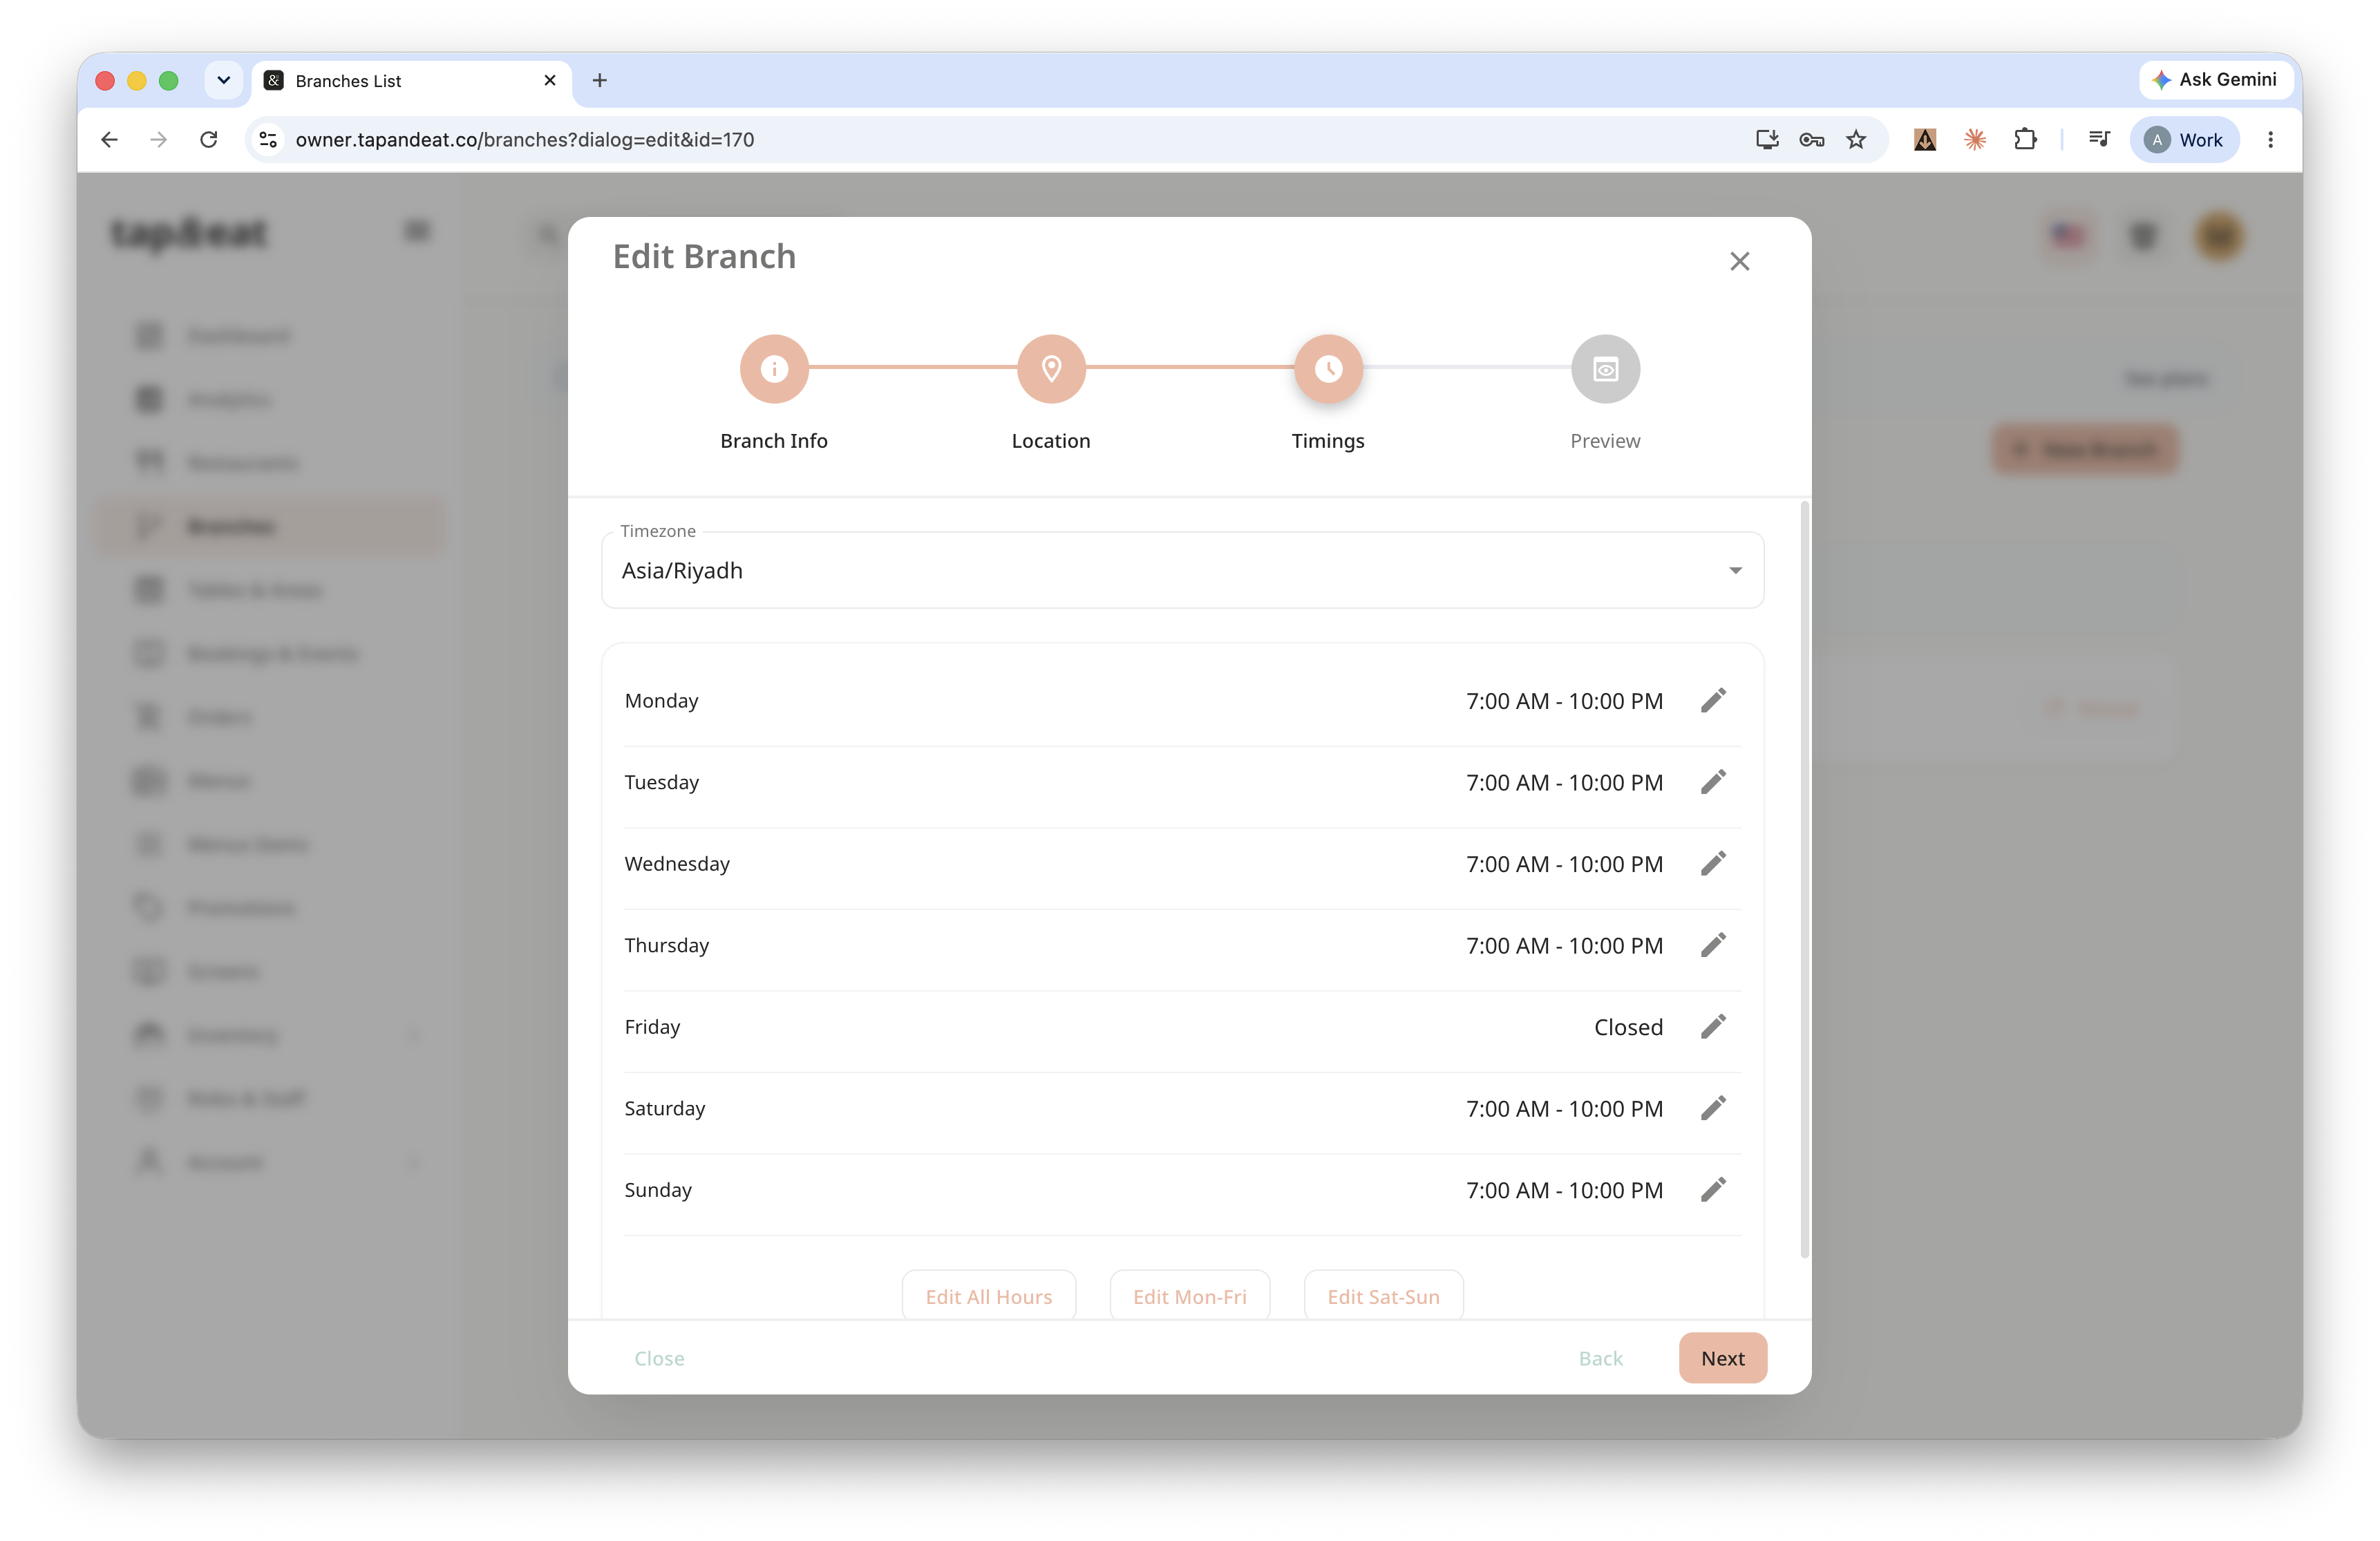
Step 4 — Timings
Confirm the timezone (it fills in from the country) and set the opening and closing hours for each day. Click Next.
Step 5 — Preview
Review the summary — name, restaurant, status, hours, and location. When it looks right, click Create.
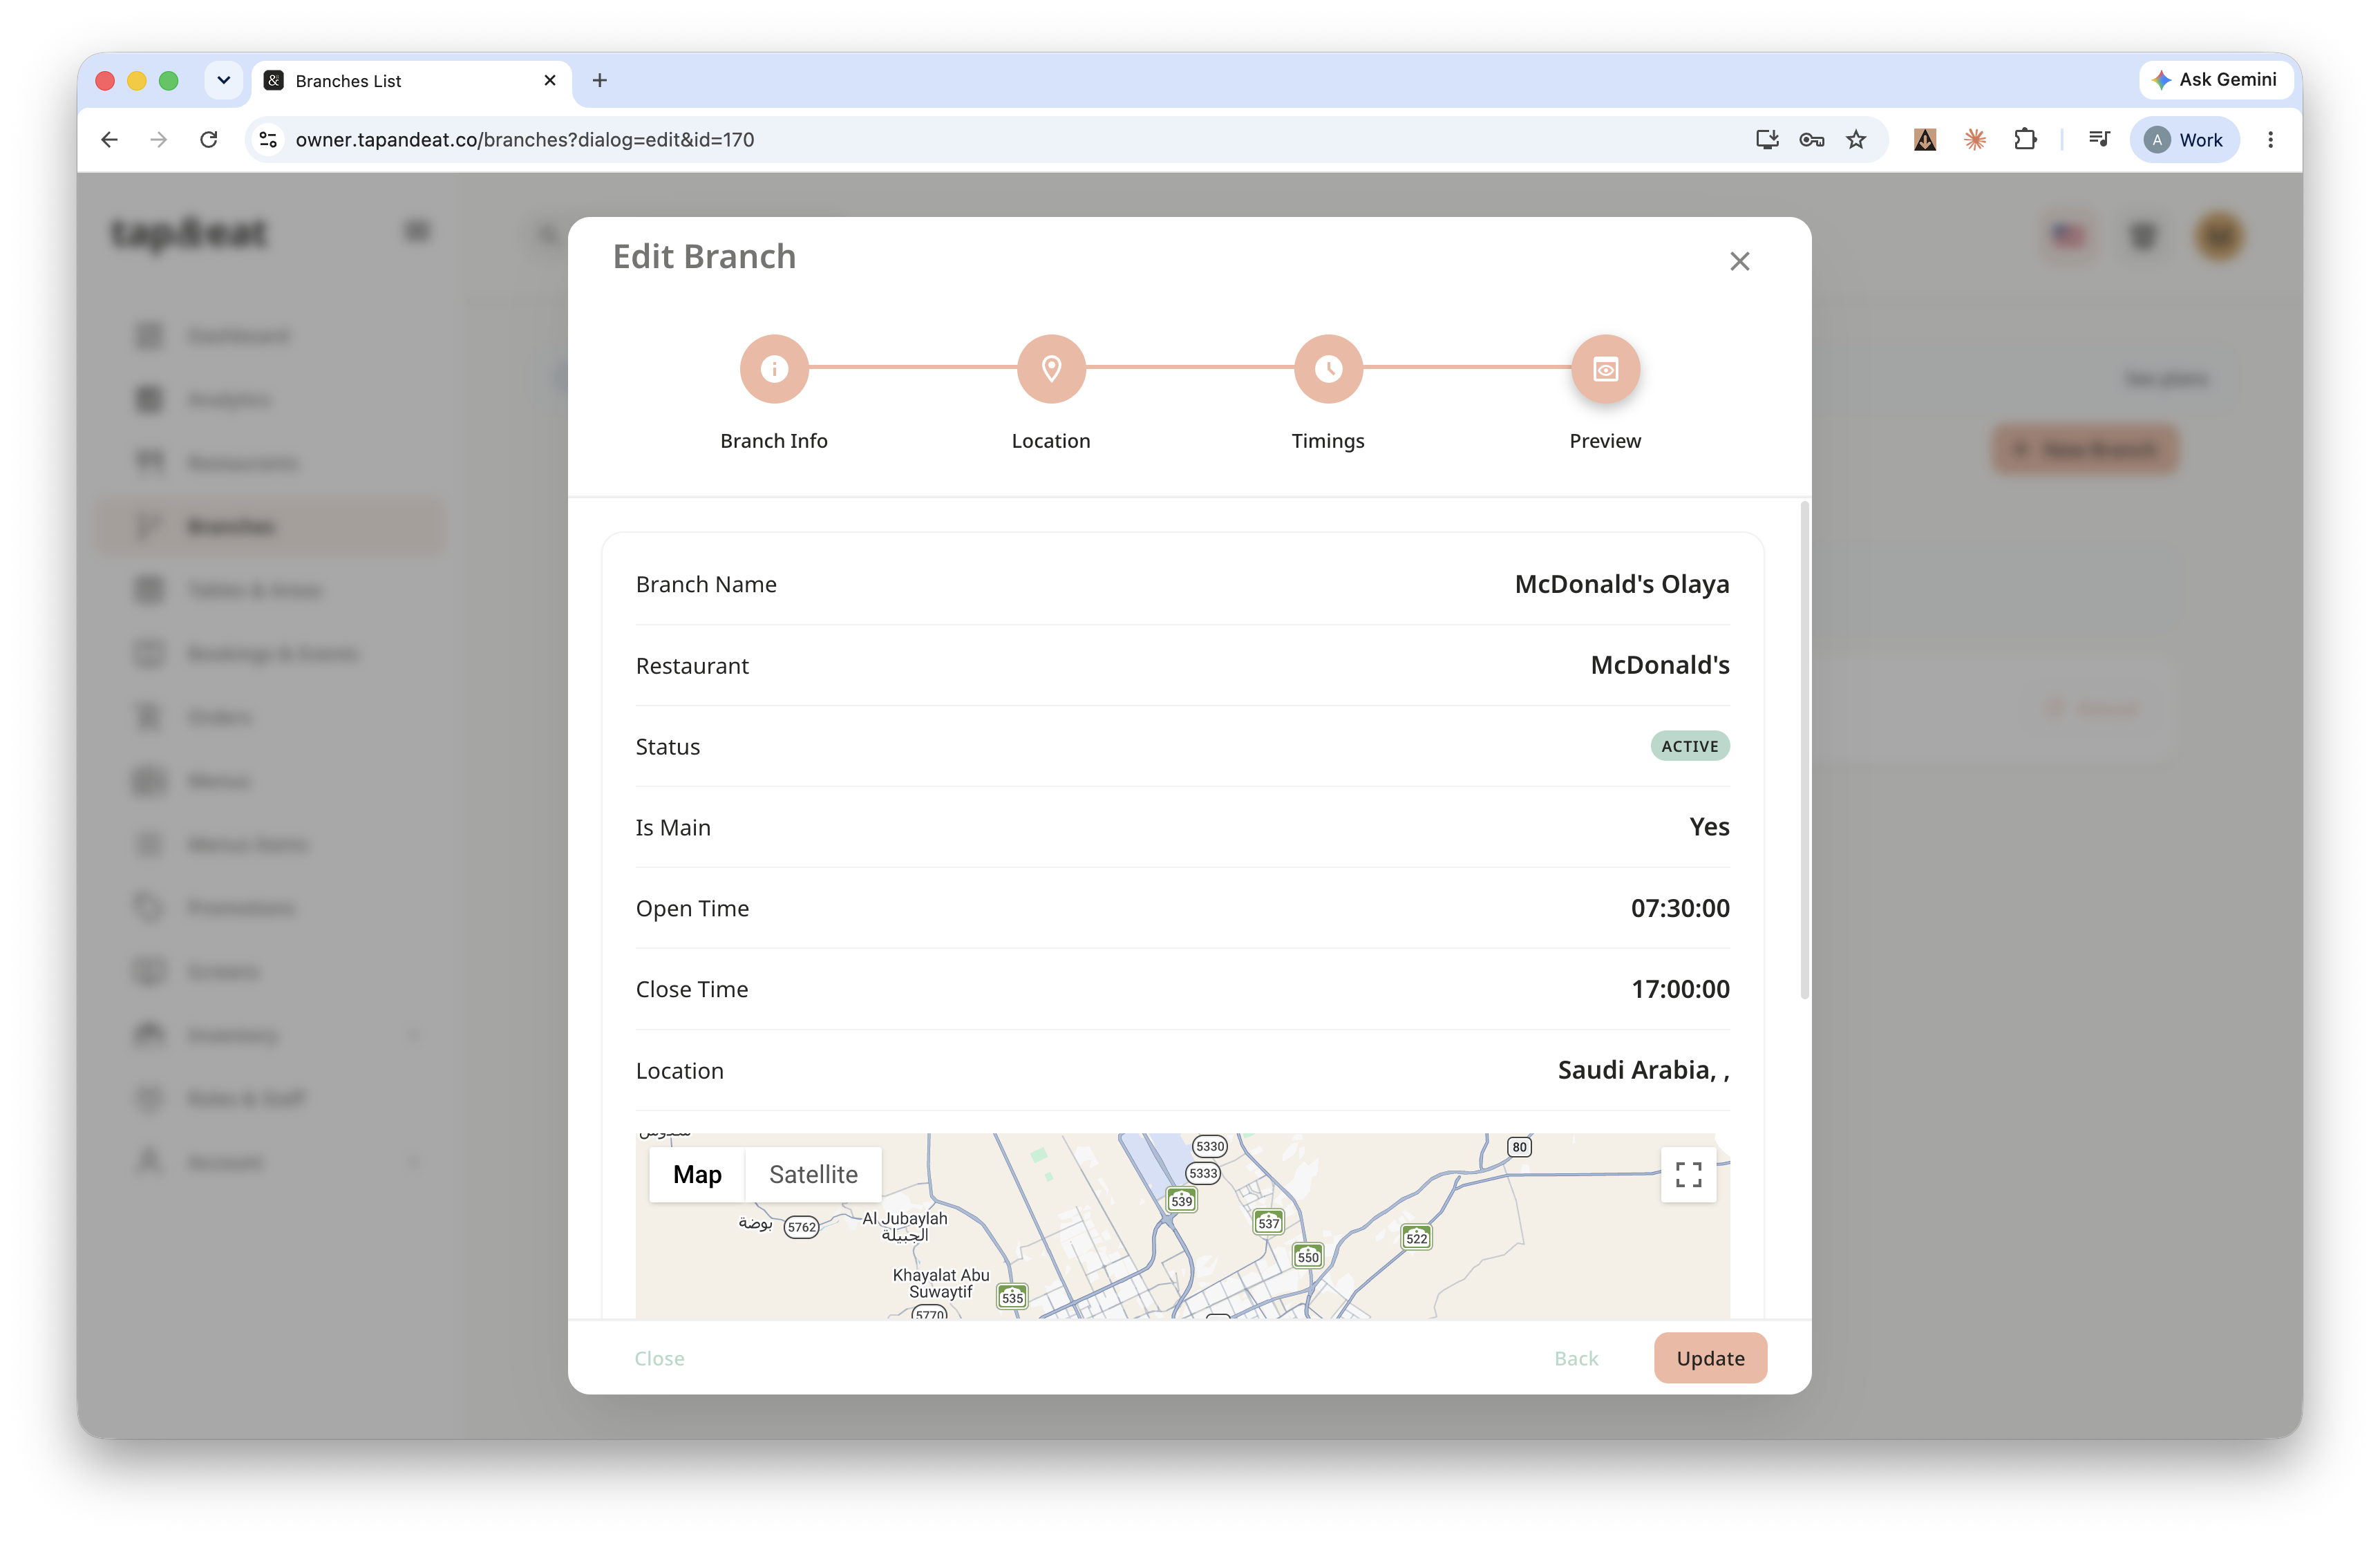
Your new branch is now live.
Note: You can edit it anytime from the Branches list.